Since Windows and ChromeOS are two distinct operating systems, users may find it challenging to collaborate across different work environments. One essential aspect of collaboration is sharing your screen content. While Chromebooks’ app compatibility and intended use cases set up a few limitations, there are ways you can share your Chromebook screen with other PCs.
Use Google Meet
Google Meet is one of the best and easiest ways to share your screen, especially when working with multiple collaborators. One quite appealing feature of Google Meet is that it does not require any installation.
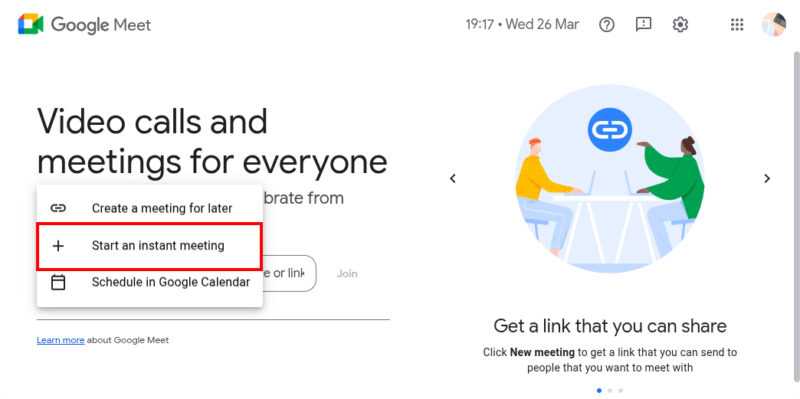
Visit Google Meet’s official website and click on the New Meeting button.
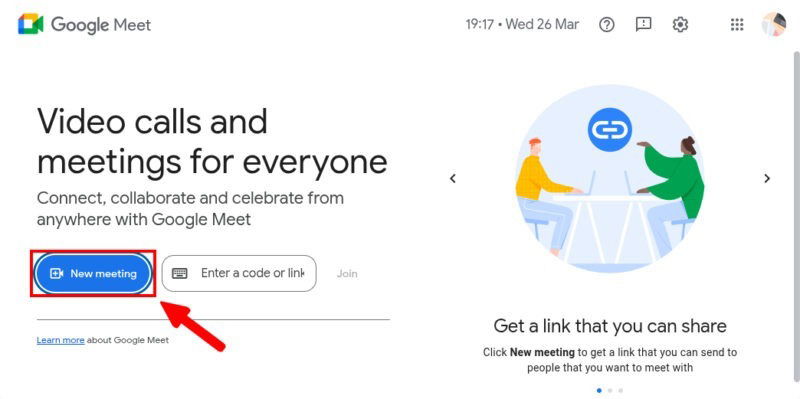
From the drop-down menu, choose Start an instant meeting. You can also schedule a meeting using Google Calendar if you prefer.
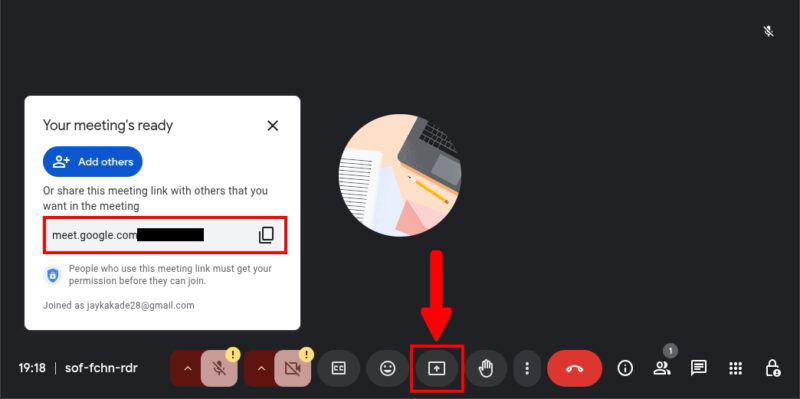
Copy the meeting link and share it with the other meeting participants. Once everyone has joined the meeting, click on the Present now button next to the raised-hand emoji.
To share your entire screen, select the Entire Screen tab from the pop-up menu, choose Built-in display, and click Share.
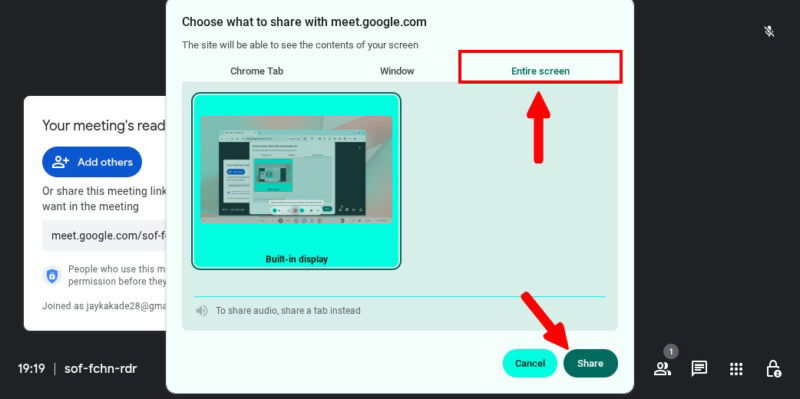
Keep in mind that sharing the entire screen will display all on-screen information and may even expose your private details as well. Therefore, we recommend sharing separate windows rather than the entire screen.
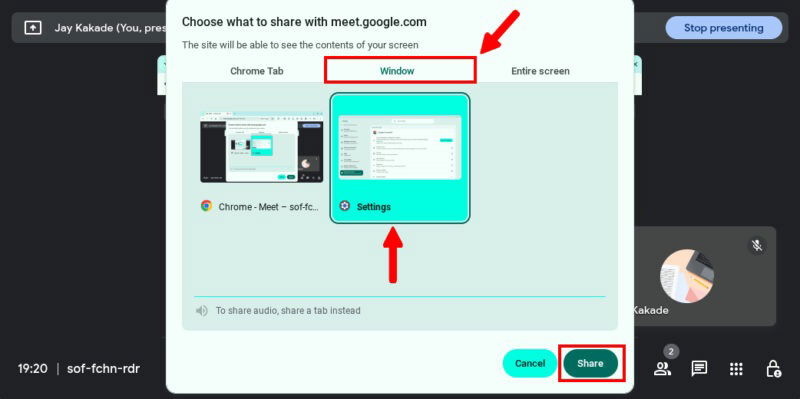
Follow the same steps until you click the Present now button, then choose Window. Select the specific window you want to share and click the Share button. You can leave your browser and navigate freely throughout the shared window while Google Meet transmits only the chosen window.
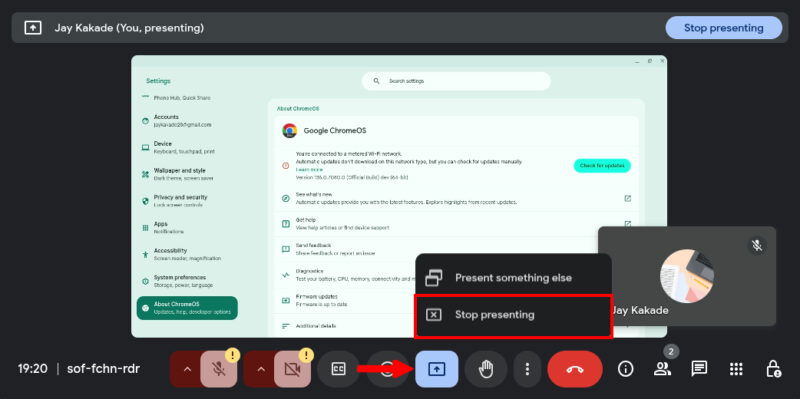
To end the screen-sharing session, click on the Present Now button again, and choose Stop Presenting.
Use Chrome Remote Desktop
Chrome Remote Desktop is a remote access tool developed by Google that allows users to access and control another computer over the Internet. The best thing about this tool is the almost negligible latency when the devices are connected to the same network.
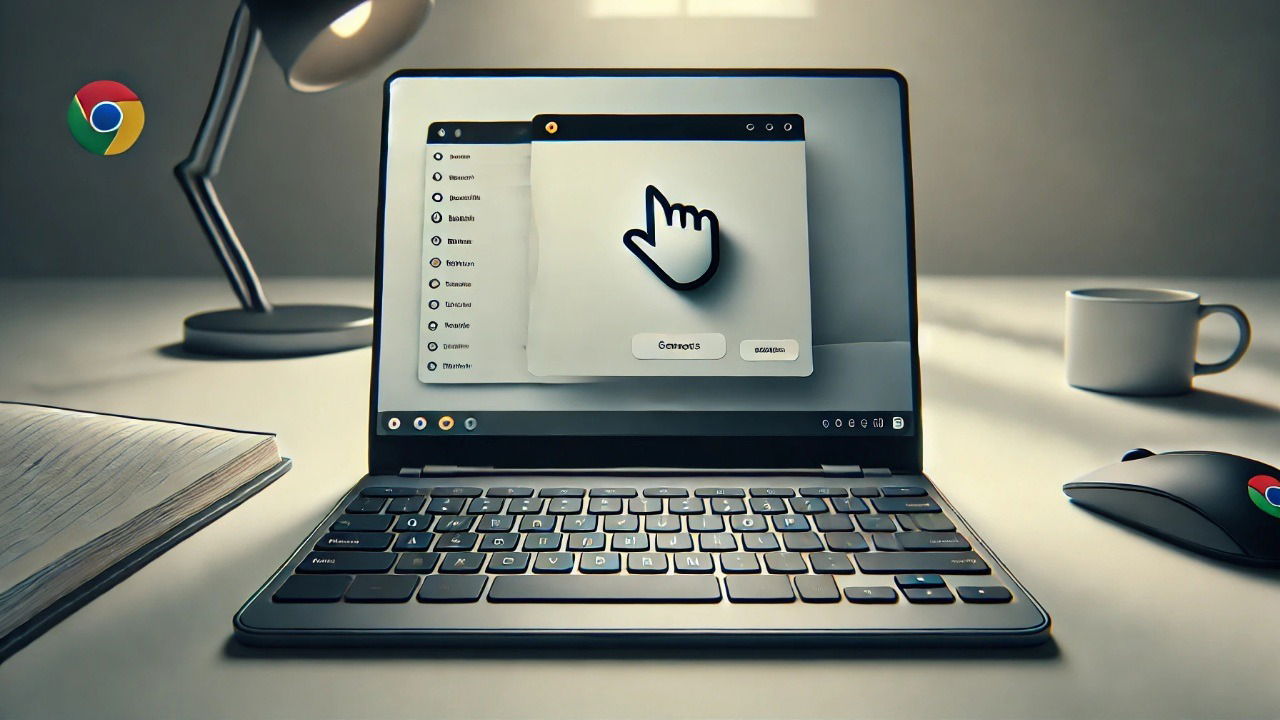
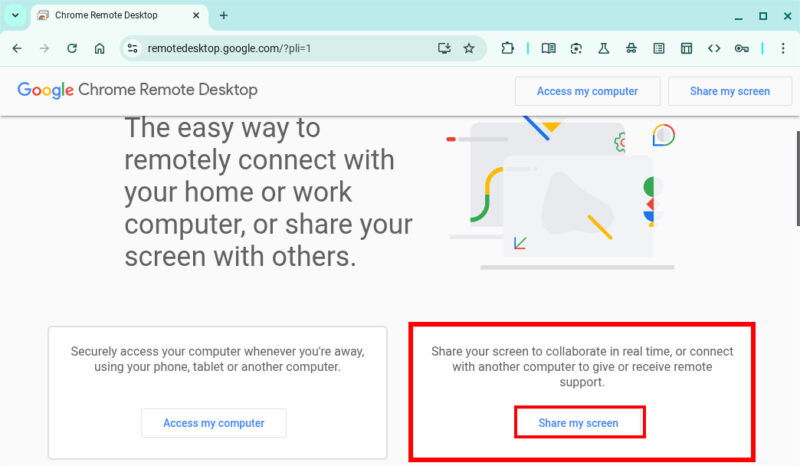
To share your screen and make it accessible from Windows, visit Chrome Remote Desktop on your Chromebook, and click Share My Screen. You will be redirected to the Remote Support page for Chrome Remote Desktop.
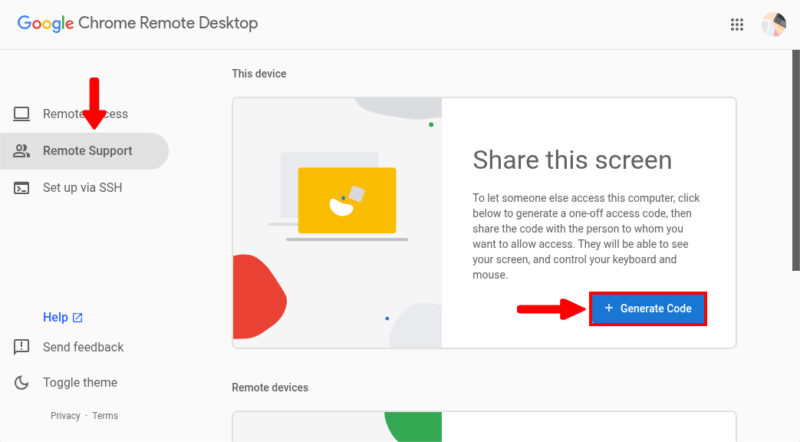
Open the Remote Support menu from the left Options panel, and click the Generate Code button.
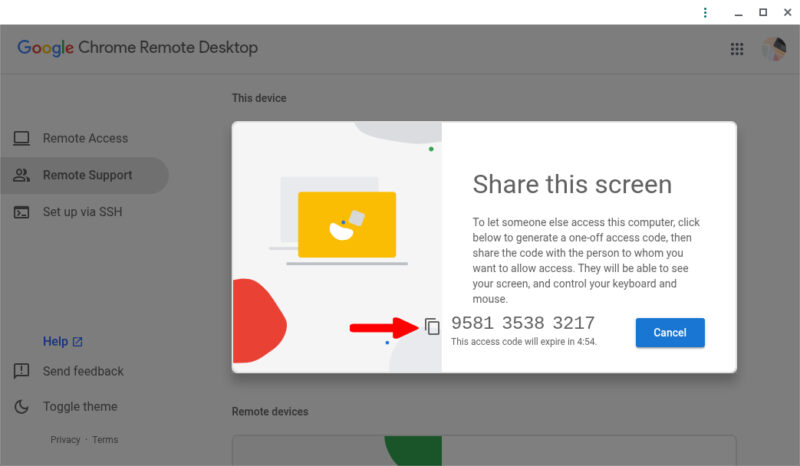
Note down or copy the access code, as your Windows PC will use it to access the screen. Although the access code expires after five minutes, this brief time frame is sufficient for pairing the devices.
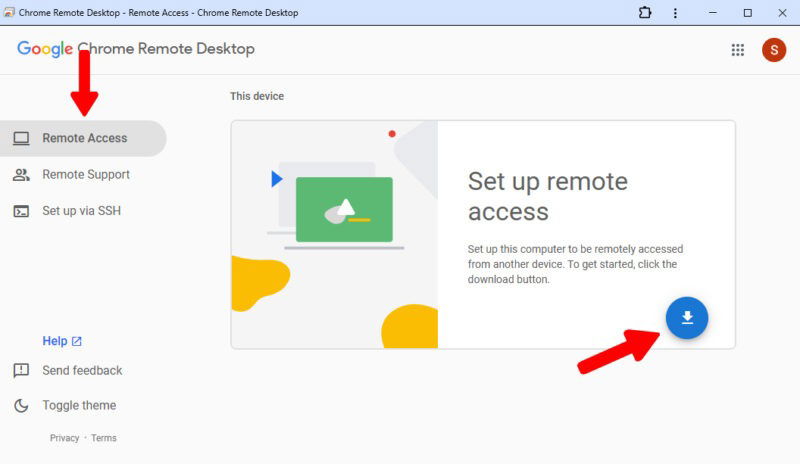
You will have to set up remote access on the other computer. Visit Chrome Remote Desktop, and open the Remote Access settings from the Options menu. Click the Download button to download the setup.
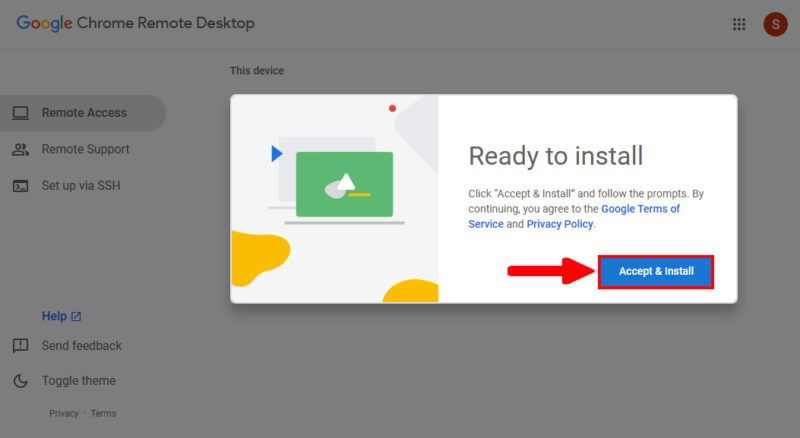
Chrome Remote Desktop will ask you to accept the terms of service and install the tool. Click Accept & Install to begin the installation process.
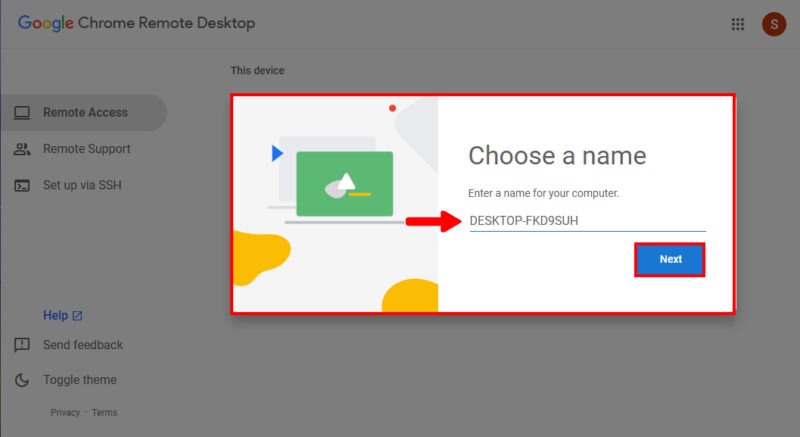
Once installed, enter the name of your computer, and click Next.
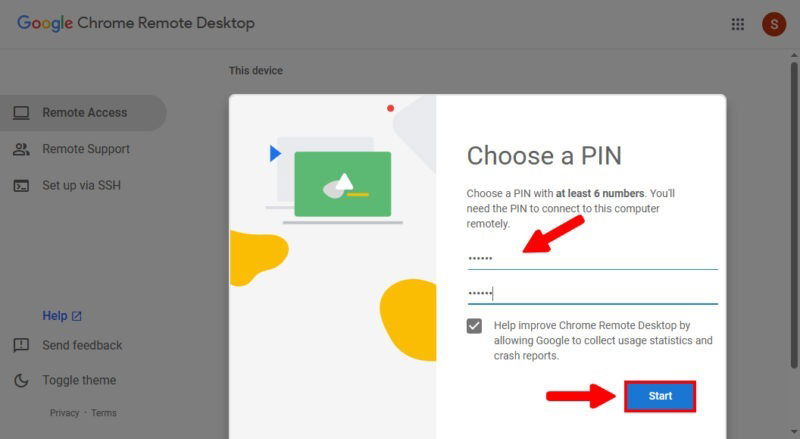
You will be prompted to enter a PIN with at least 6 numbers. You will need this PIN later to share your computer screen via Chrome Remote Desktop.
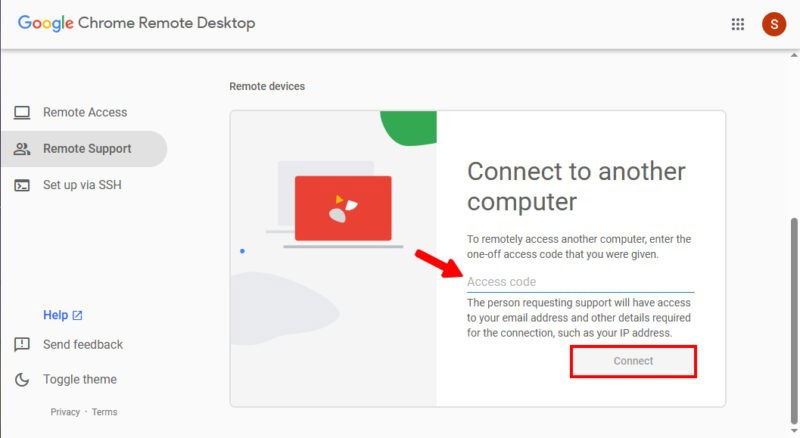
Once you complete the setup, enter the Access code from earlier, and click Connect.
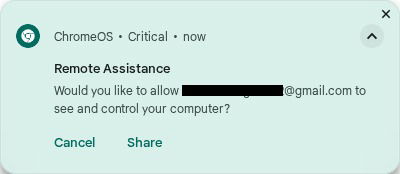
Once you see the confirmation toast on your Chromebook, click Share. Your Chromebook screen will be visible on your Windows PC.
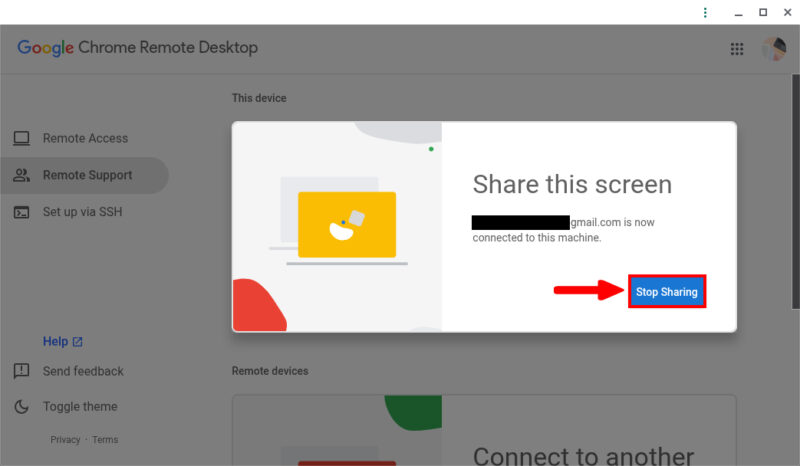
When you are finished, click Stop Sharing.
Always remember that sharing the screen may expose your sensitive information, such as contacts, messages, or media. Be sure to hide and protect private data that you do not wish to be shared.
Image credit: Unsplash. All screenshots by Jay Kakade.