
Wemux is a powerful tool that expands Tmux to allow for real-time multi-user sessions. It provides view-only as well as shared and individually controlled terminals, giving you the freedom to run Tmux across multiple users. In this article, I will go through the process of installing Wemux, creating a guest user, and share Tmux on a real-time server.
Installing Wemux in Linux
The first step in installing Wemux is to make sure that your system is up-to-date:
sudo apt update && sudo apt upgrade -yInstall the dependencies for Wemux using your package manager:
sudo apt install git tmux sshNavigate to your home directory, then clone the Wemux repository from the project’s Github page:
cd ~/
git clone https://github.com/zolrath/wemux.git
Copy the git directory to a shared system folder. In my case, I will copy it to my “/usr/local/share” directory:
sudo cp -rv ~/wemux /usr/local/shareGo to the system directory where you copied Wemux, then create a symbolic link to a folder that’s a part of your $PATH variable:
cd /usr/local/share
sudo ln -s /usr/local/share/wemux/wemux /usr/local/bin/wemux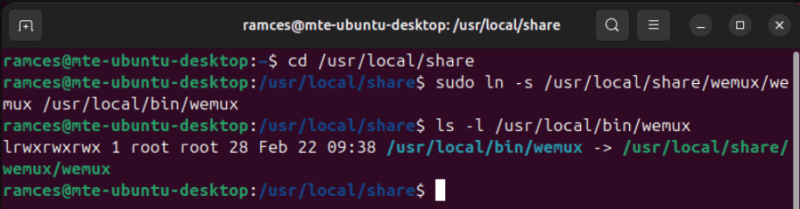
Copy the prebuilt config file from the Wemux system directory to “/usr/local/etc.” This contains all the necessary settings and permissions to create a Wemux session:
sudo cp /usr/local/share/wemux/wemux.conf.example /usr/local/etc/wemux.confReload your current shell session, then run the following command to confirm that you’ve installed Wemux properly:
wemux help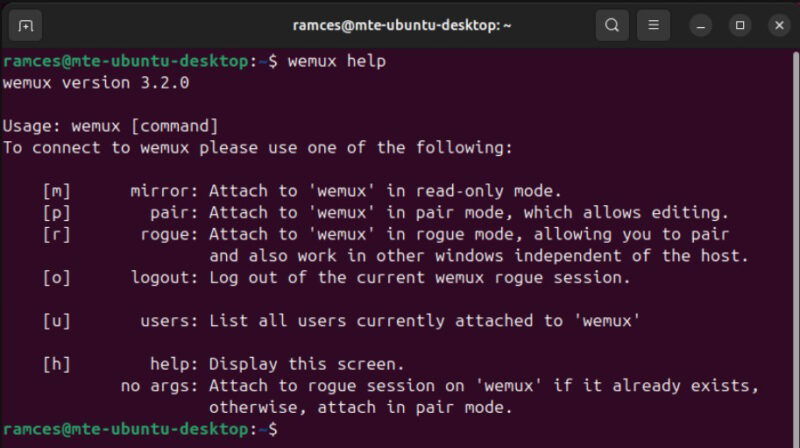
Good to know: looking to expand your familiarity with the command line? Check out our guide to getting started with the Linux terminal.
Setting Up Your First Wemux Session
At this point, you now have Wemux running on your machine. However, you still won’t be able to create a shareable terminal session. This is because Wemux will only listen to commands coming from a valid “Wemux user.”
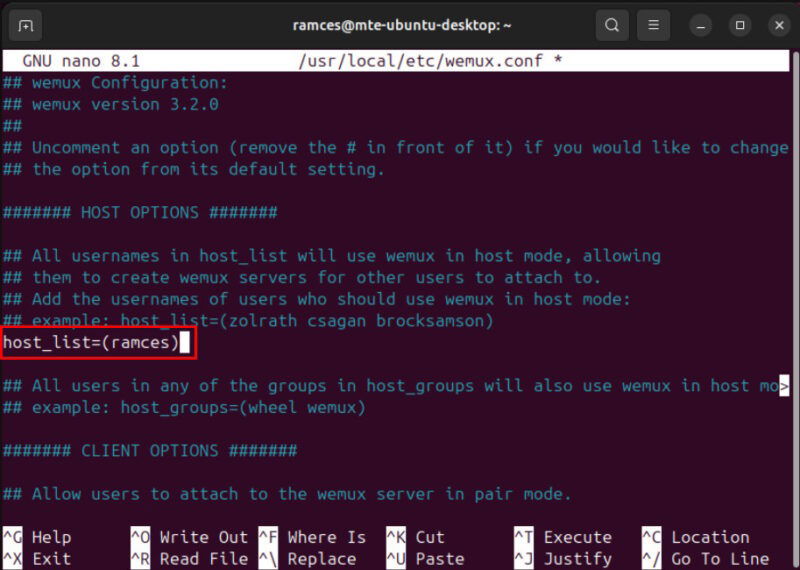
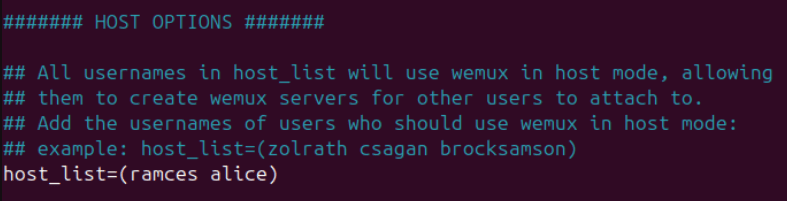
To create your first Wemux session, open the config file that you’ve copied “/usr/local/etc:”
sudo nano /usr/local/etc/wemux.confScroll to the HOST OPTIONS section, then paste the following line of code underneath it:
host_list=(YOUR_USERNAME)Replace the “YOUR_USERNAME” with your system’s username. You can find this by running whoami on a terminal window.
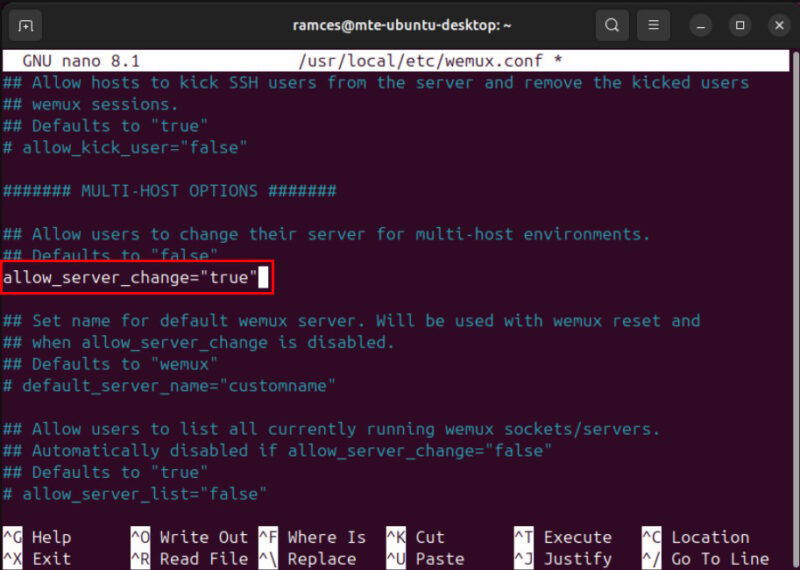
Scroll down to the MULTI-HOST OPTIONS section, then remove the pound (#) sign before the allow_server_change variable. This will allow you to run and share multiple real-time Tmux sessions on the same Wemux machine.
Save your modified config file, then run the following command to test whether Wemux can create a new session properly:
wemux start
Joining in a Shared Wemux Session
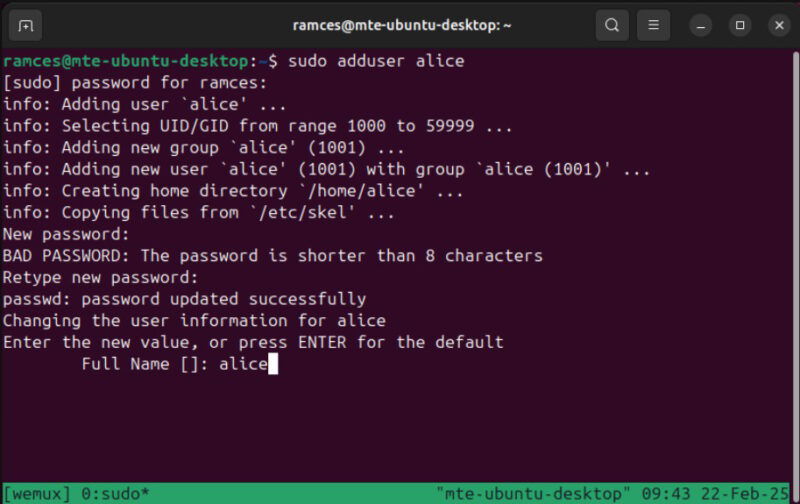
With Wemux working properly, joining a shared session is as simple as connecting to the machine through SSH. Start by making sure that the guest user has a proper shell account on your system:
sudo adduser aliceType a password for your new shell user, then provide any identifying details for the user account.
Make sure that you’ve created your new user properly by checking if it has a home directory:
ls -l /homeOpen your shared terminal for guests by running the following command inside your host’s Wemux session. This a Tmux-specific flag that allows other users in the system to connect and interact with your shared terminal server:
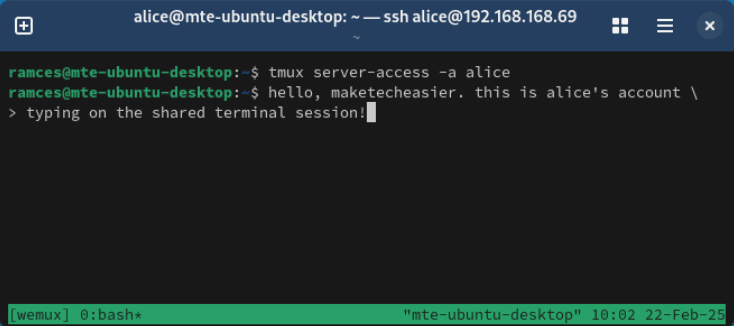
tmux server-access -a GUEST_USERNAME_HERE
Note: this is a non-persistent command. This means that you need to run it whenever you share a real-time Tmux session in Wemux.
Login as your guest user, then run the following command to connect to the host’s Wemux session:
wemux m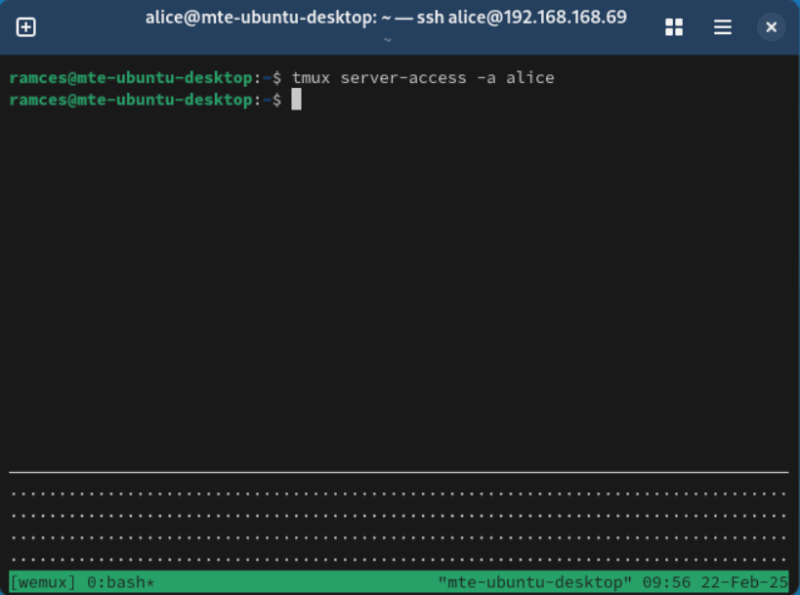
On a side note: optimize your terminal setup today by looking at the best productivity-focused plugins for Tmux.
Allowing Terminal Collaboration in Wemux
Aside from showing a read-only mode of the terminal, Wemux hosts can also allow guests to interact with a shared session. To do this, start by pressing Ctrl + B, then D to detach from the current Wemux instance.

Run the following command to stop the Wemux daemon:
wemux stopOpen the Wemux config file using your favorite text editor:
sudo nano /usr/local/etc/wemux.confScroll to the host_list variable and then add the username of the user that you want to give editing access to.
It’s also possible to give specific system groups the privilege to run and interact with a shared Wemux session. To do this, uncomment the host_groups variable, then add the name of the group that you want to give editing privileges to.

Save your config file, then start a new Wemux session to apply your new settings.
Confirm that it’s working properly by logging in as your guest user, then running wemux attach to connect to the current server.
Managing Multiple Wemux Servers
Another useful feature of Wemux is its ability to run multiple independent terminal servers. This is especially helpful if you want to create terminal groups for different tasks.
Begin by pressing Ctrl + B, then D to detach your host user to the current Wemux session.
Run the following command to create a separate Wemux terminal server, then immediately start it:
wemux join YOUR_GROUP_NAME
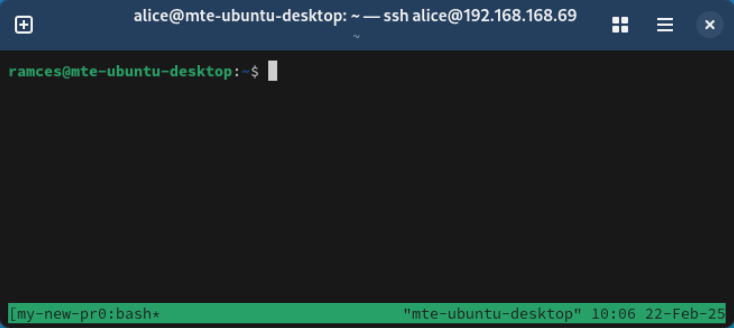
wemux startGo to your guest user, then run wemux join followed by the name of your new server. In my case, I named my group “my-new-project.”

Run wemux attach to connect the guest account to your new server.
Learning how to create a shareable Tmux session with Wemux is just one of the things that you can do with this wonderful terminal multiplexer. Looking to optimize your terminal experience? Check out some of the tricks that I did to streamline Tmux today.
Image credit: Grok via x.ai. All alterations and screenshots by Ramces Red.