Selling your Windows PC requires more than just a quick handoff. You need to take the necessary steps to ensure your current data is safe and the transition to the new owner is smooth. This guide lists all the necessary steps you need to take before selling or giving away your Windows PC.
1. Backup Your Data
Before handing it over, you have to format the hard drive and wipe your data. Therefore, you need to make sure all the important data is backed up and safe before the reformatting. If you don’t want to miss out on anything, then creating a full system image is the best way. For specific data, using the File History tool would be better.
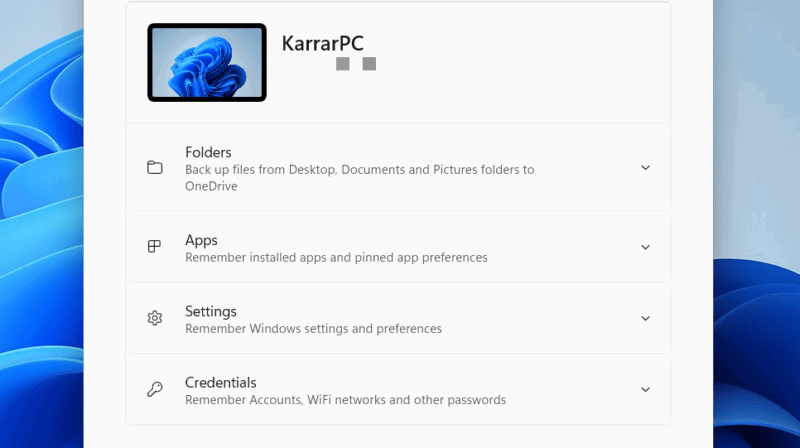
For cloud backup, Windows has a backup app that can store most of the important data in OneDrive. Search for “windows backup” in Windows Search and open the Windows Backup app. You can then select folders, apps, settings, and credentials to back up. Of course, you can also use other cloud storage services like Dropbox or Google Drive to back up data.
Make Sure All the Data is Synced
We depend on many apps that use real-time data sync features to keep data available across devices. However, the real-time sync doesn’t always work due to connectivity issues, pauses due to errors, or storage limits. If you wipe your device before a service is able to sync, you may lose the latest data.
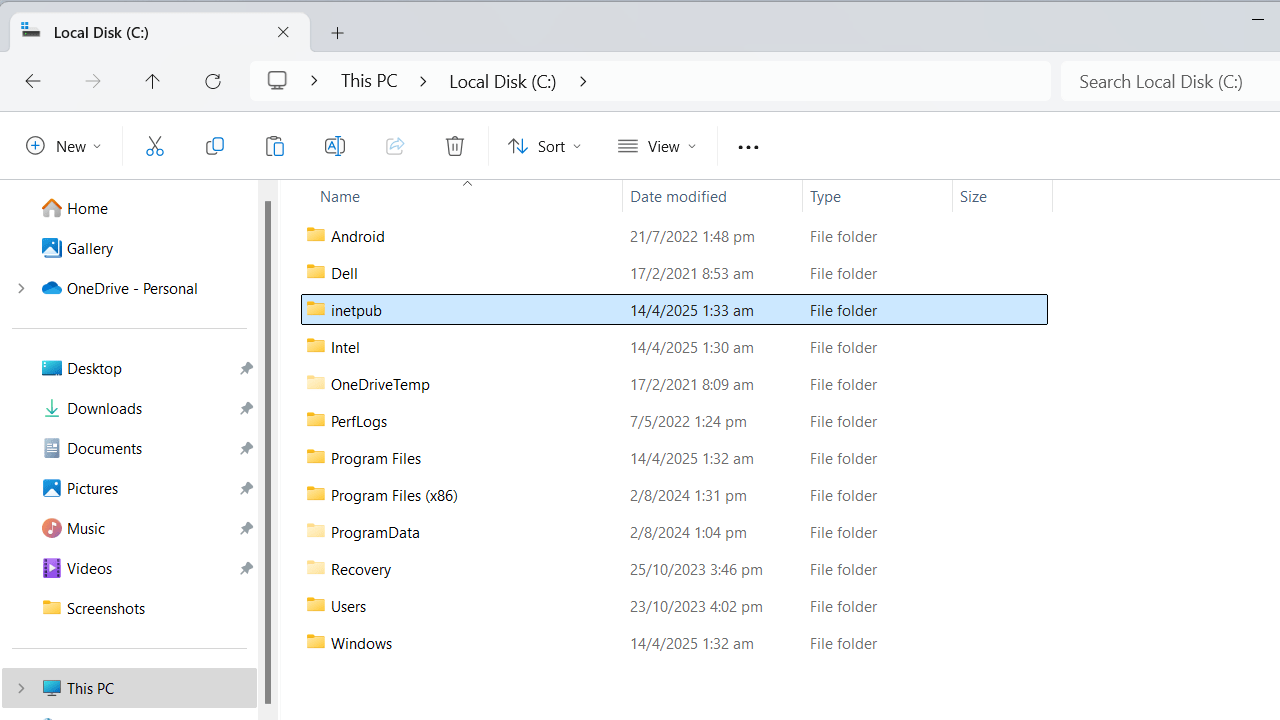
The most common culprit is your browser data as most browsers sync data with your associated account, such as Chrome, Opera, Edge, etc. Cloud back up services can also face syncing issues. Before deleting any data, check all such apps/services and ensure they have “Up to date” status or a synced sign.
2. Unlink Licenses
While most licenses/subscriptions today can easily be moved to a new PC using the online account, some still attach to PC hardware and need to be manually transferred or removed. If you don’t unlink them before handing over the PC, you might lose access to the service or cause issues for the new owner.
This includes tools such as Ableton Live, Internet Download Manager, some machine-bound licenses, and many games. Before wiping the PC, make sure you don’t have any such software that is hardware-bound and needs to be manually unlinked. If you do have such software, unlink and transfer the license to another PC first before selling your PC.
3. Securely Wipe Data and Reinstall Windows
When it comes to deleting data, simply reinstalling Windows isn’t enough. Your deleted data can still be recovered using data recovery software. You need to properly wipe and overwrite the storage drive to make data unrecoverable.
Thankfully, Windows 10/11 has a built-in feature to wipe and overwrite data to make it difficult to recover data.
To wipe and reinstall Windows, go to System → Recovery in Windows Settings and click on Reset PC.
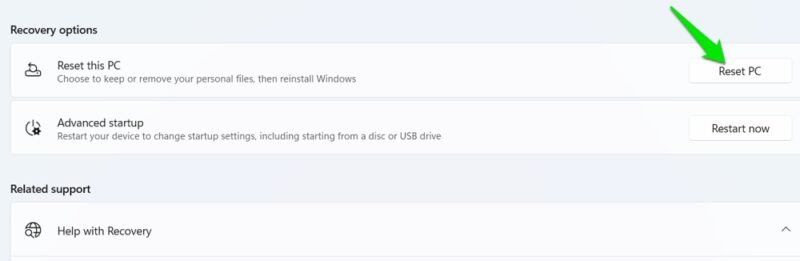
Now select Remove everything → Change settings and enable Clean data and Delete files from all drives? options. Afterward, click on Next → Reset to start the reset process.
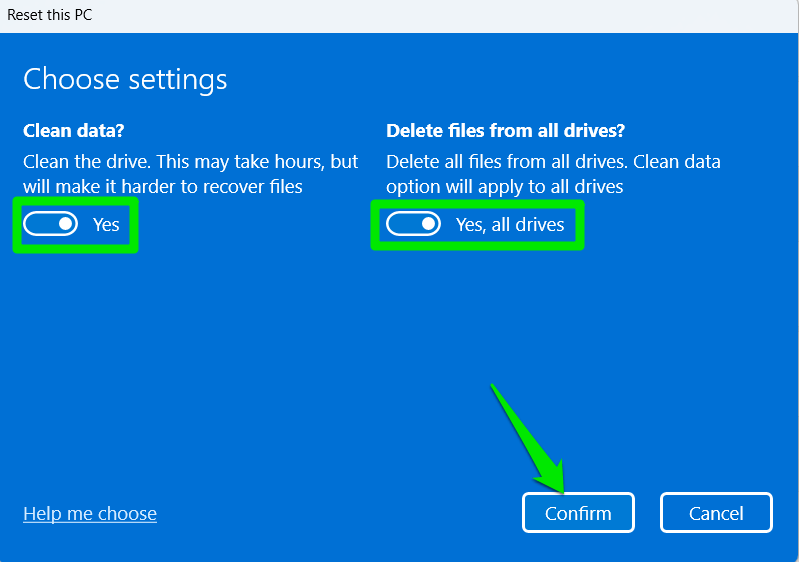
The process will take time as it overwrites data with random patterns, wipes all files, and reinstalls Windows
If you have extremely sensitive/valuable data and don’t want to take any chances, then use Disk Wipe to wipe the drive that had the data. It offers military standard drive wiping solutions that make data unrecoverable. A paid tool like PartedMagic can also help multi-pass wipe the storage drive from outside Windows, but you’ll have to perform a clean install of Windows later.
4. Update Windows and Drivers
After reinstalling Windows, you should also update it and PC drivers to ensure the PC works properly. Whether you are giving away or selling, it will make it easier for people to test the PC without facing any problems.
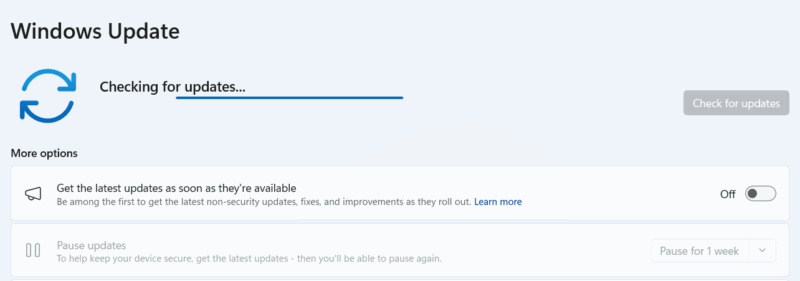
To update Windows, open Windows Settings, go to Windows Update, and click on Check for updates to download and install all updates.
If your PC requires any specific drivers other than the latest, make sure you install them and let the new owner know.
5. Check Hardware Health and Install Testing Software
Your PC may have underlying hardware problems without showing any signs. Thankfully, you can use built-in and third-party tools to check hardware health to ensure no problems occur after handing over the PC. You can read our guide on how to check PC health to learn ways to check the health of different components.
You can also install hardware testing tools for the other party to inspect the PC. Below are our recommendations:
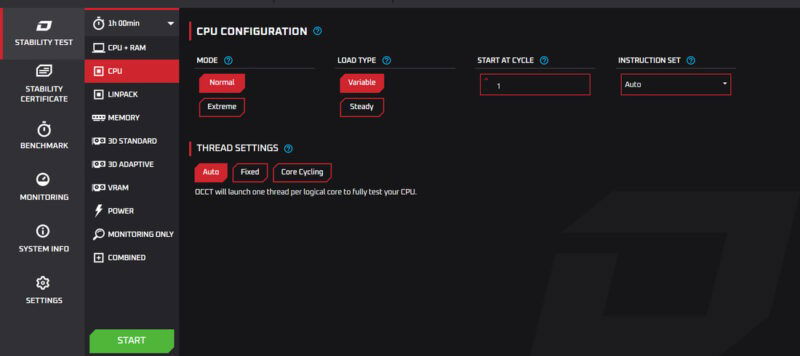
- OCCT: an all-in-one tool to stress test CPU, GPU, RAM and PSU. It can detect problems during testing and comes with a built-in usage monitor. Check our guide on using OCCT for stress testing to learn more.
- CrystalDiskMark: it can help benchmark storage drive performance by running different types of tests.
Both of these tools are enough to cover the main PC components that affect performance and stability.
6. Create a System Specs Sheet
A specs sheet contains all hardware upgrades and replacements, along with the status of all the components. For selling, having an up-to-date specs sheet will greatly streamline the process of advertising your PC specs. You can easily generate a complete specs sheet using a built-in Windows tool.
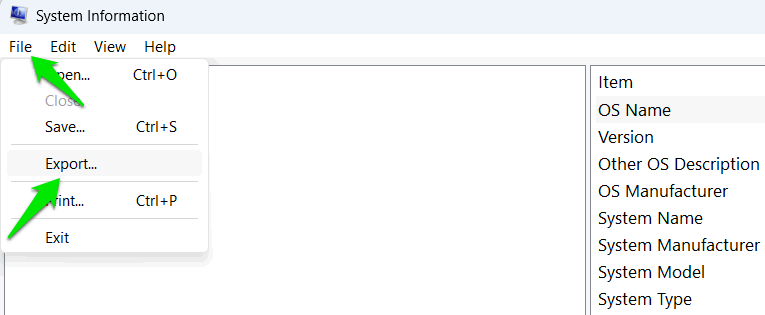
Search “system information” in Windows Search and open the System Information tool. Click on File → Export and save the file. It will be a .txt file with all the information.
7. Clean the PC Physically
Lastly, cleaning the PC physically will ensure a great presentation and also improve performance if it’s too dirty. Apart from cleaning it from the outside using a microfiber cloth, you should also clean it from the inside. It’s not that difficult, just follow our computer cleaning guide and your PC will be shiny clean in no time.
If your PC is older, consider reapplying thermal paste after cleaning the heatsink and CPU.
Reset BIOS Settings (Optional)
If you have ever made any changes in the BIOS, it’s a good idea to reset the BIOS to factory settings so the new owner may not face any issues. While there are many ways to reset the BIOS, the easiest is to enter BIOS and click on the Load Defaults button. This will reset BIOS settings without affecting BIOS firmware.
By taking these steps, you’re not just protecting your data – you’re giving your PC a fresh start and its new owner peace of mind. If you own a Mac as well, you might want to learn how to prepare your Mac for selling or giving away.
Image credit: Vecteezy. All screenshots by Karrar Haider.