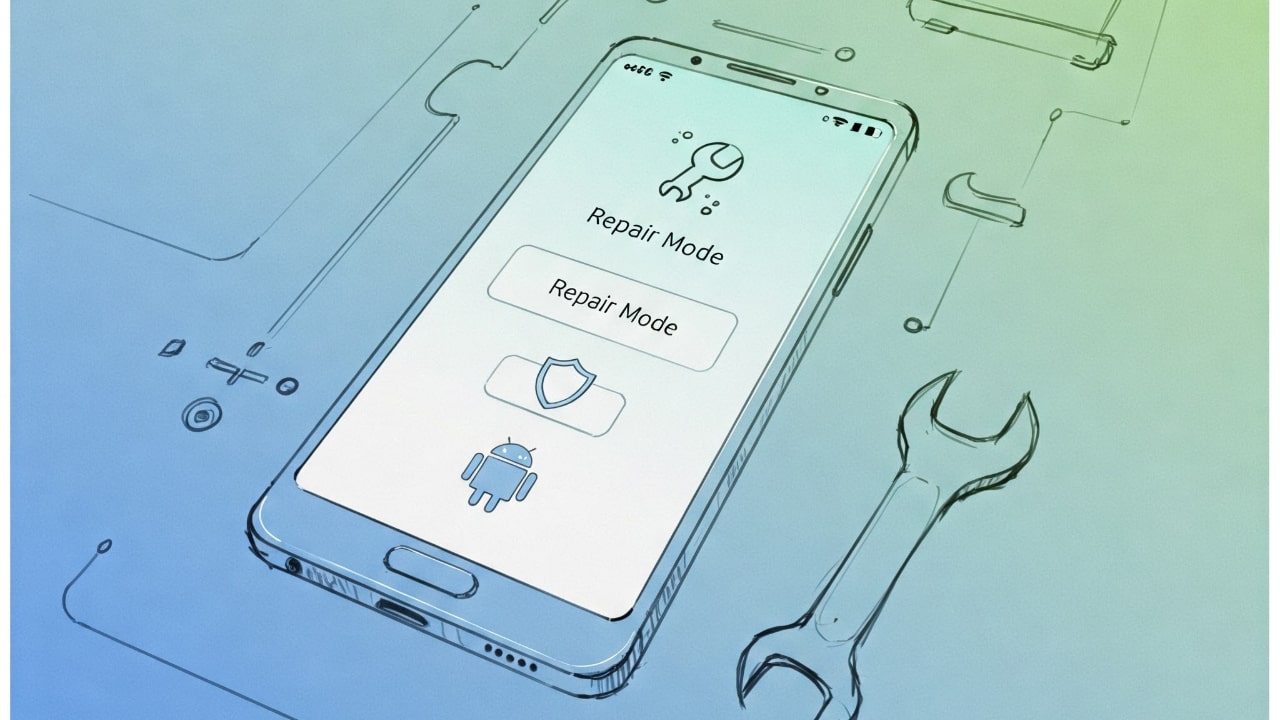
Android Repair Mode ensures that your personal data is protected, even when your device is out of commission. Before submitting your Android device for repair, use Repair Mode to hide personal information, like videos, images, contacts, and SMS messages. Read on to learn more about this feature.
How Does Repair Mode Work?
Repair Mode acts as a specialized recovery state or a safe mode during the repair of your Android. It allows the technician to diagnose and repair hardware without accessing your sensitive data.

When Repair Mode is enabled, the device installs a clean Android operating system (OS) in a separate partition with limited functions. This mode effectively isolates photos, videos, and other multimedia content from diagnostic features, such as firmware and system logs, diagnostic tools, and hardware test functions. As a result, the repair personnel can only use functions necessary for troubleshooting.
Note that functionalities like Bluetooth, Wi-Fi, phone calls, and mobile data remain available, even in Repair Mode. Therefore, it’s generally recommended to remove your SIM card before submitting the device for servicing.
How to Enable Repair Mode
Before turning on Repair Mode, ensure that you have at least 10% in your Android device’s storage space available and that you have set a lock screen password (PIN or pattern), as you will need it to disable Repair Mode later.
Keep in mind that not every Android device will explicitly label this functionality as “Repair Mode,” but the steps to enable and disable it are generally similar. For this guide, I am using an OnePlus device.
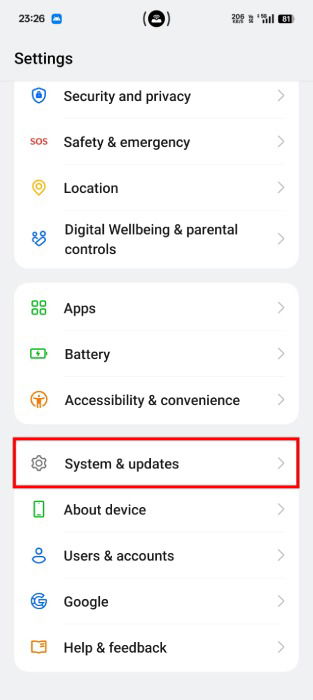
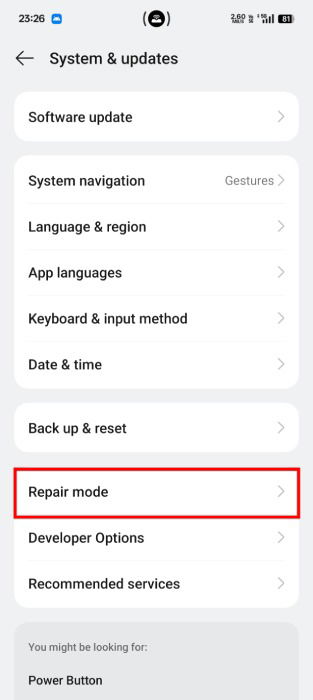
Open your device’s Settings app, scroll to the bottom, and select System & updates.
Click on Repair mode.
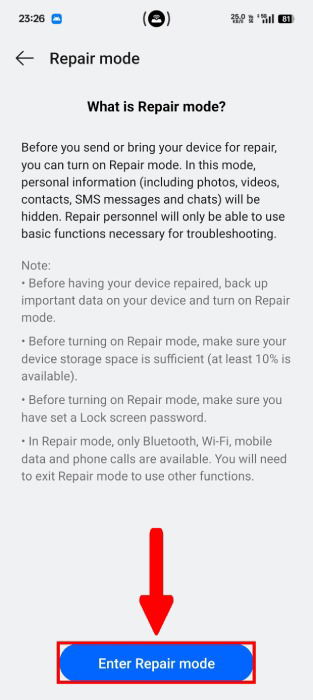
Read the explanation of the Repair mode feature and the instructions, then click on the Enter Repair Mode button at the bottom.
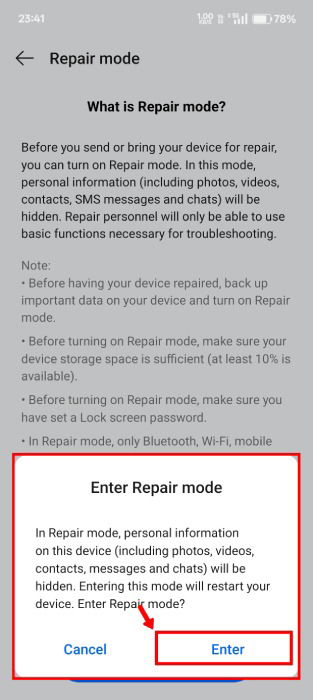
You will be prompted to enter your security password (Lock screen PIN or pattern), then will be asked to confirm that you want to begin this process. Click on Enter if you wish to proceed. If you haven’t set a Lock Screen password, you will be asked to.
A notification will let you know that you are “Entering Repair Mode,” before the device restarts. Rebooting may take longer than usual, but once the system restarts, you will be in Repair Mode. Any changes you make in this mode will not be carried forward or applied to the device after disabling it.
Disable Repair Mode
Repair Mode can be disabled on your Android via the Settings app: System & updates -> Repair Mode -> Disable Repair Mode. Alternatively, and more conveniently, open the Notification Drawer by swiping down from the top screen and clicking Tap to exit Repair mode.

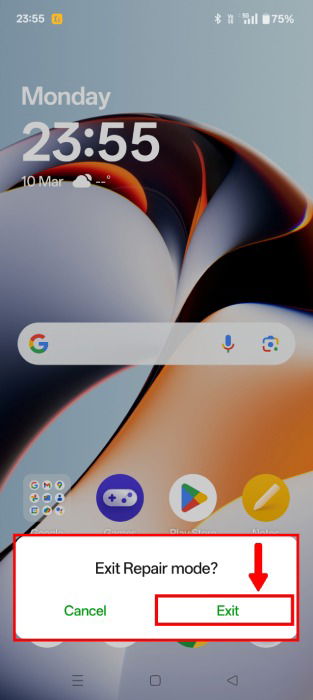
You will be asked to confirm the exit flow. Click on Exit from the pop-up menu, and allow the system to reboot. Similar to activating Repair Mode, the system restart may take a while.
Even though the Android Repair Mode adds a layer of security to your private data during repair or servicing, we still recommend having a general backup. Such backups may help you restore any lost data in case of unforeseen issues like hardware failures or software glitches.
Image credit: Imagen3. All screenshots by Jay Kakade.