Windows lock screen settings can be quite restrictive, only allowing you to manage background pictures and status. If you want further control over the Windows lock screen, you’ll have to turn to Windows Registry hacks. Customize your lock screen with these Registry tweaks.
Warning: make sure you back up the Registry before making any changes to it. Any incorrect change in the Registry could lead to system corruption and data loss.
Access Windows Registry
Open Windows Registry by searching for “registry” in Windows Search or type regedit in the Windows Run dialog (Win + R). Do this from an administrator account or use the administrator account’s login credentials.
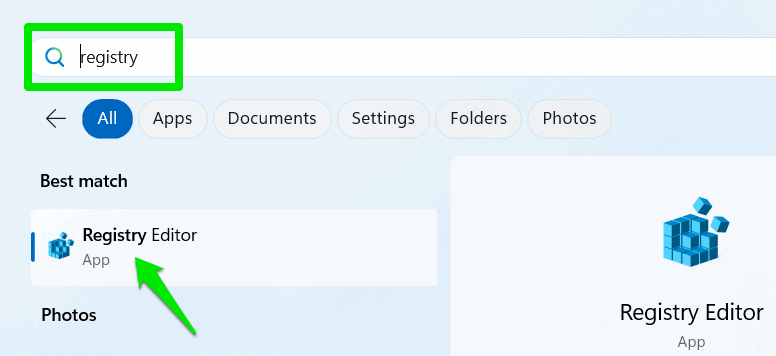
Once you have access, copy/paste the provided locations in the search bar at the top to quickly reach them. Read on to learn how to navigate the Windows Registry.
1. Add Custom Message on the Lock Screen
You can add a custom message on your lock screen that will be displayed when you or someone else interacts with your PC. While it’s mainly used in enterprise environments to display legal notices/disclaimers, it can have many other uses as well. For example, you can add a personalized message/joke, reminders, PC recovery information, or warnings to deter unauthorized access.
If you want to add a custom message to your lock screen, move to the following location in the Windows Registry:
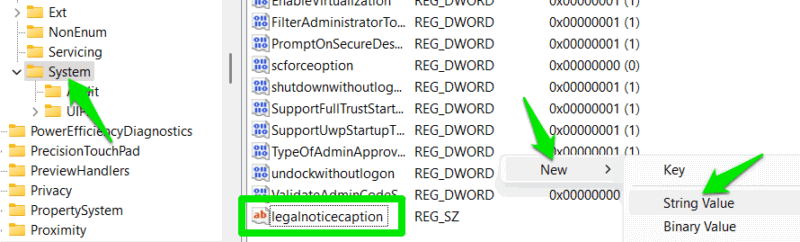
HKEY_LOCAL_MACHINE\SOFTWARE\Microsoft\Windows\CurrentVersion\Policies\SystemIn the System key, right-click in the right column, select New → String Value, and name it legalnoticecaption.
Repeat the same steps to create another String value, and name it legalnoticetext.
Double-click on legalnoticecaption, and add the title of your message. In legalnoticetext, add the message itself.
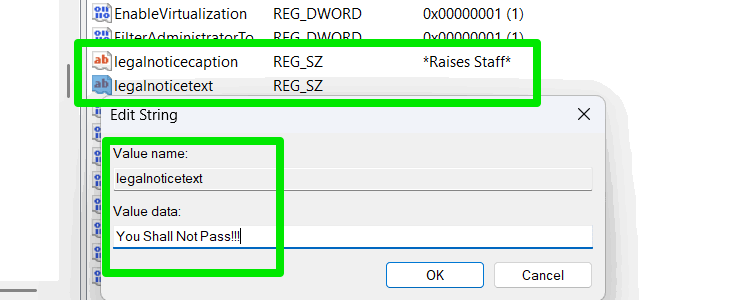
You’ll have to restart the PC for the changes to take effect. Keep in mind that there is a character limit on both the title (63 characters) and the message (approximately 2048 characters). Any characters exceeding the limit will not show on the lock screen.
2. Disable User Switching From the Lock Screen
For multiple users, you can remove the ability to select secondary user accounts from the lock screen. This enhances security by hiding other accounts and preventing password-cracking attempts on secondary accounts.
To remove the ability to switch accounts from the lock screen, disable the fast user switching feature.
Move to the System key again:
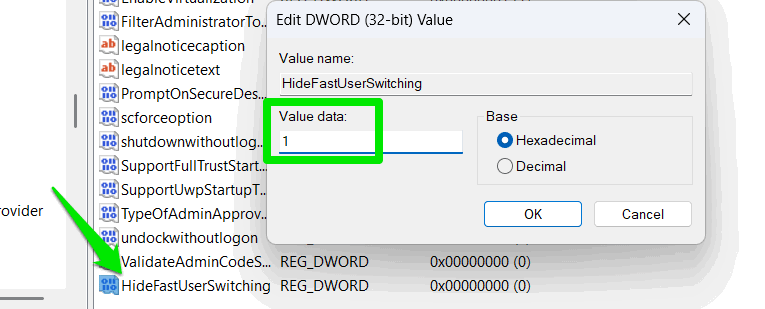
HKEY_LOCAL_MACHINE\SOFTWARE\Microsoft\Windows\CurrentVersion\Policies\SystemRight-click in the right column, and select New → DWORD (32-bit) Value.
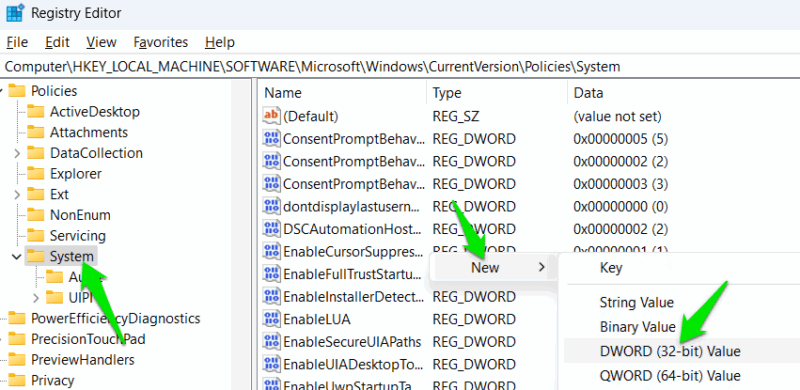
Name this value HideFastUserSwitching, double-click on it, and set its value to 1.
This will immediately remove the ability to switch user accounts from the lock screen. If you do have to switch users, you’ll have to first log in to the main admin account, then manually log out to get the option to select other user accounts.
3. Manage Lock Screen Timeout Duration
No matter which delay timer you select for turning off the display, the lock screen will always timeout after one minute. There is no option to increase the timeout duration to make it more convenient. However, with a Registry hack, this option can be added to the power plan settings to manage the lock screen timeout duration.
Go to this location in the Registry:
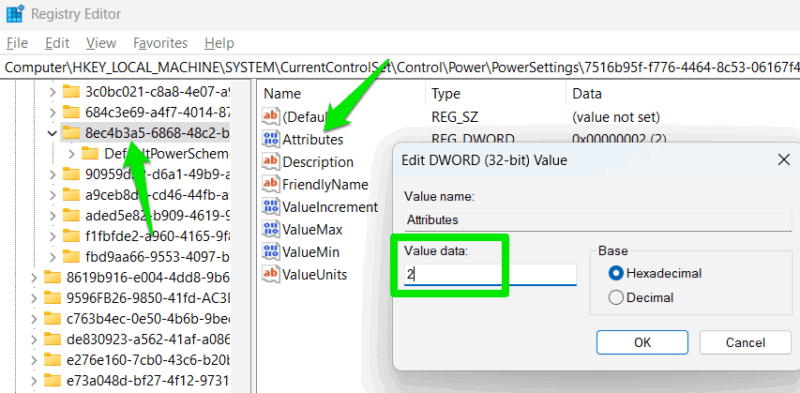
HKEY_LOCAL_MACHINE\SYSTEM\CurrentControlSet\Control\Power\PowerSettings\7516b95f-f776-4464-8c53-06167f40cc99\8EC4B3A5-6868-48c2-BE75-4F3044BE88A7Double-click on Attributes, and set its value to 2.
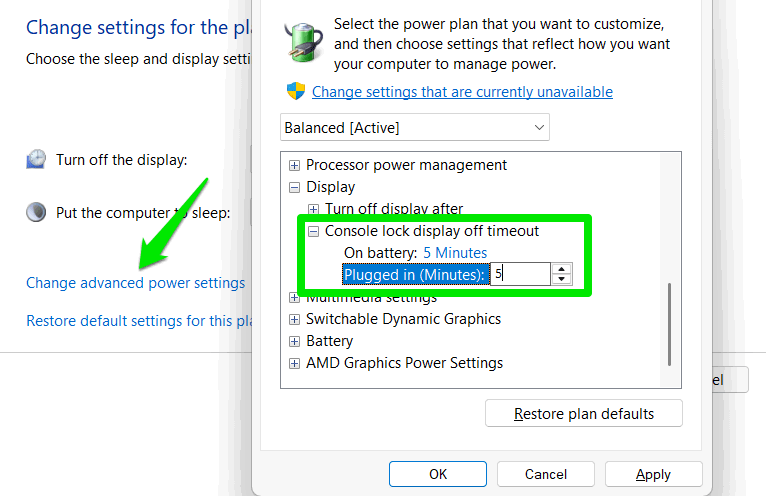
Search for “edit power plan” in Windows Search, and open the power plan settings.
Click on Change advanced power settings, move to Display → Console lock display off timeout, and change the value as you wish.
4. Disable the Power Menu Button on the Lock Screen
Windows shows the power menu on the lock screen to let you restart, shut down, or put the PC to sleep without logging in. While this option can be convenient, you may want to disable it to prevent accidental shutdowns/restarts while you have programs open inside. Additionally, if the PC is being used as a Kiosk, you don’t want the shutdown option easily accessible.
To get rid of the power menu from the lock screen, move to the below location in the Registry:
HKEY_LOCAL_MACHINE\SOFTWARE\Microsoft\Windows\CurrentVersion\Policies\SystemRight-click in the right column and select New → DWORD (32-bit) Value.
Name this value shutdownwithoutlogon, double-click on it to open it, and set its value to 0.
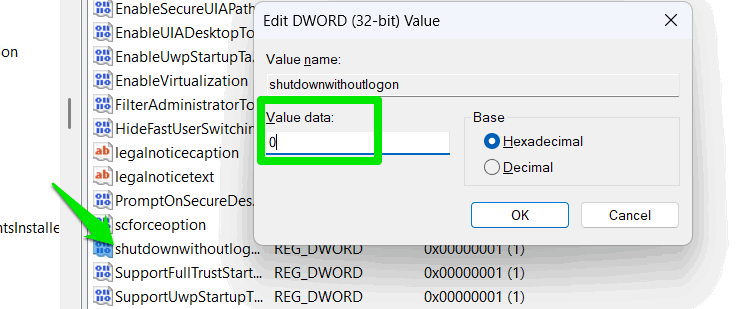
This will immediately remove the power menu button from the lock screen.
5. Completely Disable the Lock Screen
If you prefer a cleaner login experience without additional tips, news widgets, or background images, you can disable the lock screen so that you go directly to the login screen. As a bonus, you will also not be forced to press an extra key to remove the lock screen every time you need to log in.
Go to the following location:
HKEY_LOCAL_MACHINE\SOFTWARE\Policies\Microsoft\WindowsRight-click on the Windows key, select New → Key, and name this key Personalization.
Create a new DWORD value inside the Personalization key as we did above. Name this value NoLockScreen, and set its value as 1.
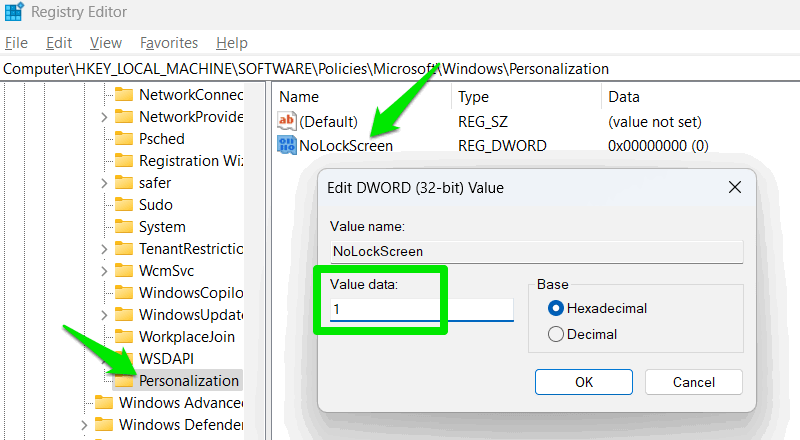
The lock screen will now be gone, and the login screen will directly open when you start the PC or lock it. If you ever need to undo any of the above changes, delete the key created in each customization method.
These hacks should give you a bit more control over your Windows lock screen and personalize it. While these hacks focused on simpler adjustments, you can also do some advanced stuff with a bit more tinkering, like accessing apps from the lock screen.
Image credit: Wikimedia Commons. All screenshots by Karrar Haider.