The Vim editor offers so many features that it’s very difficult to learn all of them. While spending more time on the command line editor always helps, there is no denying that you can learn new and productive things faster while interacting with fellow Vim users. In this article, I will go through some tips and tricks on Vim that can improve your text editing workflow today.
Table of Contents
- 1. Working with Multiple Files
- 2. Save Time with Auto Complete
- 3. Split Windows to Easily Copy and Paste
- 4. Save a File You Edited Without Permissions
- 5. Preserve Indentation During Copying and Pasting
- 6. Use Text Object Commands
- 7. Use Marks to Speed Up Editing
- 8. Automate Editing Using Macros
- 9. Take Advantage of Third-Party Plugins
1. Working with Multiple Files
If you’re a software developer or someone who uses Vim as their primary editor, chances are that you have to work with multiple files simultaneously. Following are some useful tips that you can use while working with multiple files.
Instead of opening files in different terminal tabs, you can open all of them in a single tab by passing their filenames as arguments to the vim command:
vim file1 file2 file3Doing this will load your three files into their own separate buffers inside Vim.
Use the :next or :n command to move to the next file, and the :prev or :N command to return to the previous one.
To directly switch to the first or the last file, use :bf and :bl commands, respectively.

To open and start editing another file, use the :e command with the filename as argument.
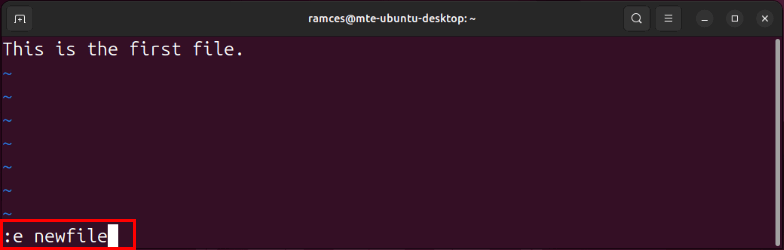
Note: You need to provide the complete path if your file is not present in the current directory.
You can also use the :ls command to list all the currently open buffers in your Vim session.

Note: The “%a” indicates that the file is in the current active window, while “#” tells you that it’s the last file that you switched to prior to the current one.
2. Save Time with Auto Complete
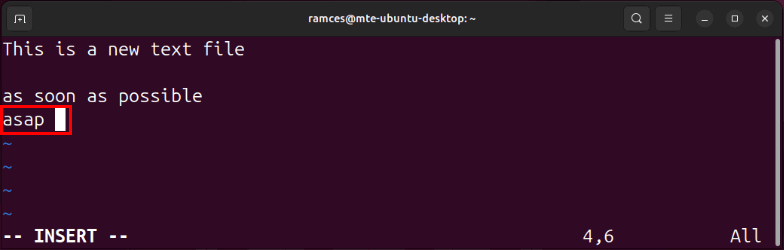
Want to save time and improve accuracy? Use abbreviations. They come in handy while writing long, complex words that occur frequently throughout a file. The command for abbreviations is ab.
For example, running the following will automatically replace the word “asap” with “as soon as possible:”
:ab asap as soon as possible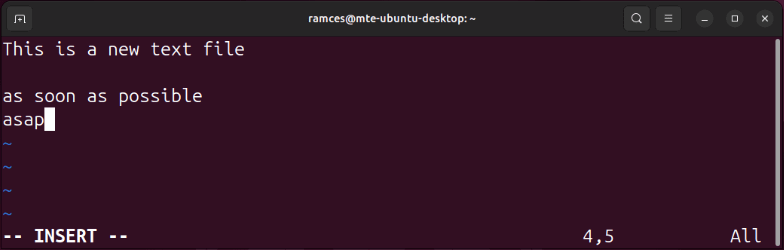
Similarly, you can also use abbreviations to correct common typing mistakes. For example, the follow command will automatically correct the spelling mistake as you type:
:ab recieve receiveIf you want to prevent the expansion/correction from happening at a particular occurrence, just press Ctrl + V after the last character of the word and then press the Space key.
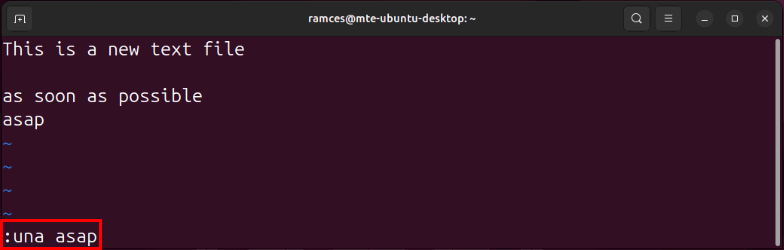
To remove a particular abbreviation, you can use the una command. For example, :una asap will delete the abbreviation for “as soon as possible.”
If you want to save the abbreviation you’ve created so that it is available to you the next time you use the Vim editor, add the complete ab command without the initial colon to the “~/.vimrc” file.
Tip: are you currently stuck in a Vim mode? Learn some of the different ways to exit the Vim editor.
3. Split Windows to Easily Copy and Paste
There are times when you want to copy a piece of code or a portion of text from one file to another. While the process is easy when working with GUI editors, it gets a bit tedious and time-consuming while working with a command line editor. Fortunately, Vim provides a way to minimize the time and effort required to do this.
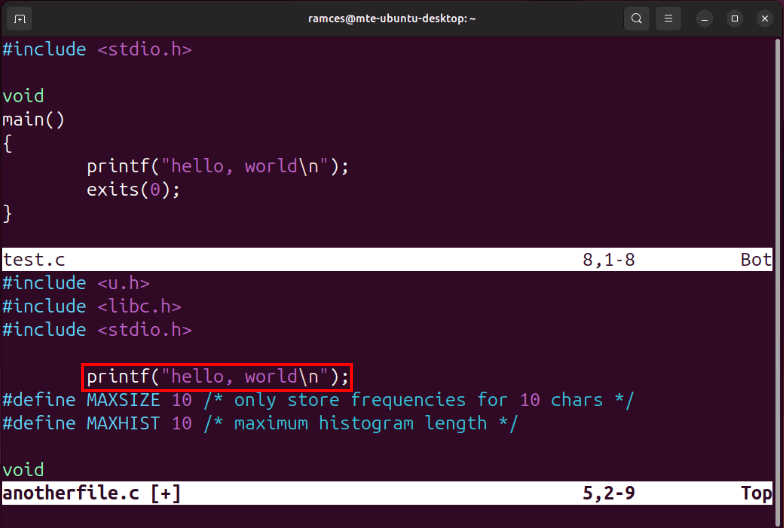
Open one of the two files and then split the Vim window to open the other file. This can be done by using the split command with the file name as argument. For example, this command will split the window and open “test.c:”
:split test.c
Observe that the command split the Vim window horizontally. In case you want to split the window vertically, you can do so using the vsplit command. Once both the files are opened, copy the stuff from one file, press Ctrl + W to switch the control to another file, and paste.
On a side note: Check out our picks for the best cross-platform text editors for programmers today.
4. Save a File You Edited Without Permissions
There are times when you realize that a file is read-only only after making a bunch of changes to it. Although closing the file and reopening it with the required permissions is a way out, doing this will lose all the changes that you’ve already made to your file.

To fix this, you can run the :w command followed by external Bash command that reloads your file with superuser priveleges:
:w !sudo tee %Vim will ask for your password to resolve the command, then it will save your current changes.
You can also quickly access your system shell while editing a file in Vim. To do that, run the :sh command from within the editor.
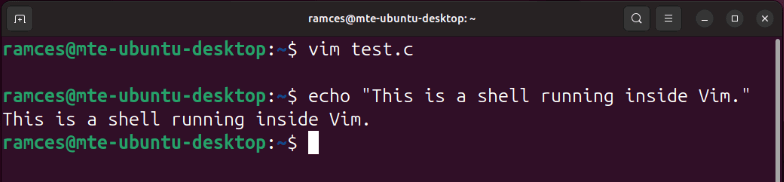
Once you are done, run the exit command to return to your Vim session.
5. Preserve Indentation During Copying and Pasting
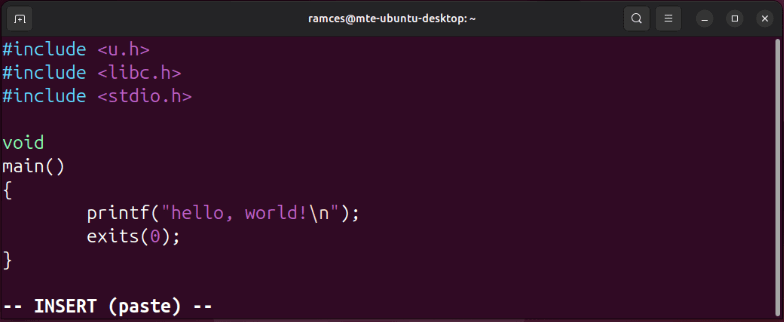
Most of the programmers work on Vim run it with its auto-indentation feature on. Although it’s a time-saving practice, it creates a problem while pasting indented code. For example, this is what happened when I pasted indented code into a Vim editor with auto-indent on.

You can fix this issue by adding the pastetoggle option to Vim’s config file. To do that, open the vimrc file, then paste the following line of code to the end of your config:
set pastetoggle=<F2>Save your vimrc, then open the file that you want to paste your indented code on.
Go into Insert Mode, then press F2 before pasting your indented code. Doing this should preserve the original indentation.
Note: you can replace F2 with any other key if it’s already mapped to some other functionality.
6. Use Text Object Commands
Another way to easily up your Vim editing game is by using its built-in “text object commands.” These are special-case movement keys that take in the context of where the cursor currently is and operates your commands inside that context.
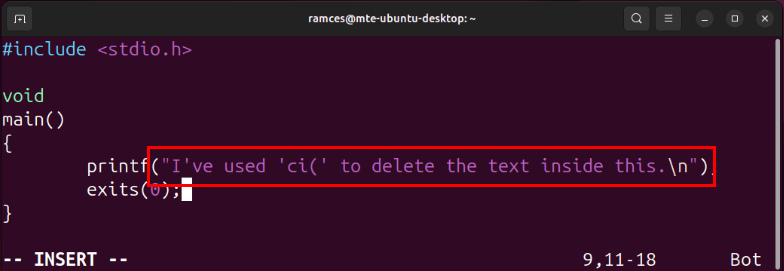
One of the most useful text object command that you can use is I. This takes a motion key such as W and operates your commands inside that context. For example, you can press C + I, then W to run the change command on the word under your Vim cursor.
The I command also works for other forms of text delimiters. For instance, pressing C + I, then Shift + 9 will clear any text in-between the parenthesis under your cursor.
7. Use Marks to Speed Up Editing
Marks are a nifty feature in Vim that saves a specific spot in your file to a key on your keyboard. Similar to browser bookmarks, these enable you to jump from point to point while editing large pieces of text and code.
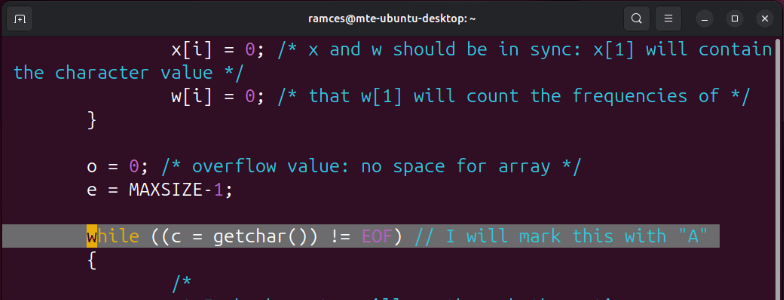
To create a Vim mark, navigate to the location that you want to save then press M, followed by the letter that you want to bind the location to. In my case, I will set my new mark to the “A” key on my keyboard.
Test whether your new mark is working properly by pressing G twice to go to the top of the document, then press ` (Grave) + A.
You can also quickly go back to your previous location by double tapping the ` (Grave) key.
To list all the available marks on your current session, press Shift + ; (Semicolon), then type marks on the command buffer.

Good to know: Level up your Vim know-how by checking out our comprehensive cheatsheet for Vim.
8. Automate Editing Using Macros
On top of convenient commands, you can also streamline your editing workflow in Vim by automating repetitive tasks using macros. It’s a built-in feature that allows you to “record” an action inside the editor and run it across an entire file.
To create a new Vim macro, press Q, followed by a key where you want to assign your macro to. For me, I will assign my new macro to my “1” key.
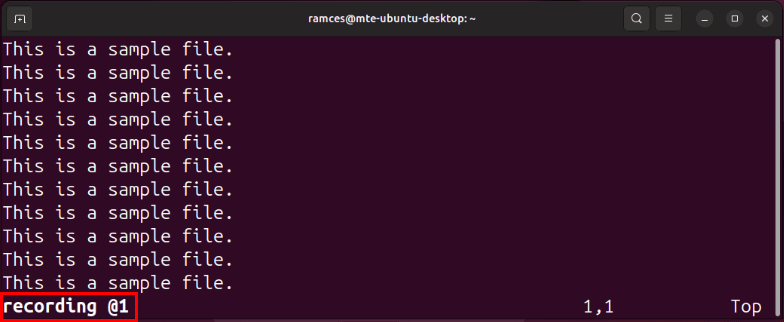
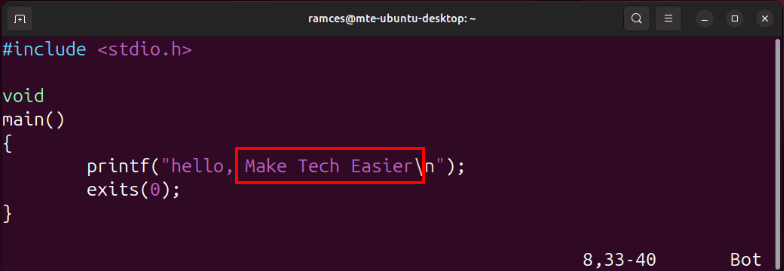
Perform the edit that you want to make on the current line. In my case, I will go to the start of the line, edit the first word to “That,” add “Hello, Make Tech Easier” at the end, then go to the next line.
Note: Vim will perform your macros exactly as you recorded it regardless of the current cursor position.
Once you’re done with your edit, press Q to save your new macro.
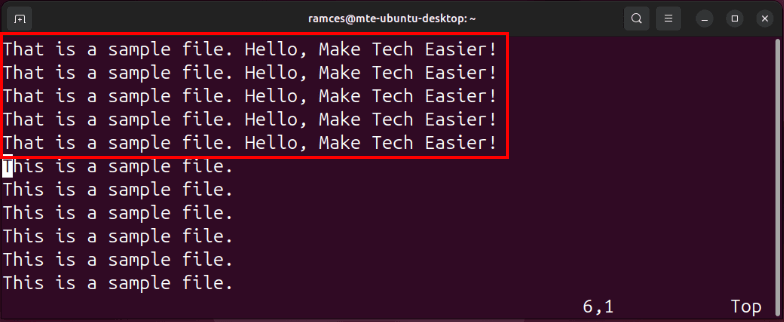
Test whether your new macro is working properly by pressing Shift + 2, followed by your macro key.
Tip: you can also perform bulk editing using Vim’s visual mode. Learn more about it by checking out our quick guide to commenting multiple lines in Vim.
9. Take Advantage of Third-Party Plugins
Aside from its stellar built-in functions, Vim is an extensible text editor that you can customize using third-party plugins. This enables you to include features not present in default Vim and shape the editor to your workflow.
The easiest way to get started with Vim plugins is by installing Plug. This is a lightweight plugin manager that handles the installation and management of your plugins directly from Vim. To install it, run the following command:
curl -fLo ~/.vim/autoload/plug.vim --create-dirs https://raw.githubusercontent.com/junegunn/vim-plug/master/plug.vimOpen your current user’s .vimrc, then paste the following block of code at the end of the file:
call plug#begin()
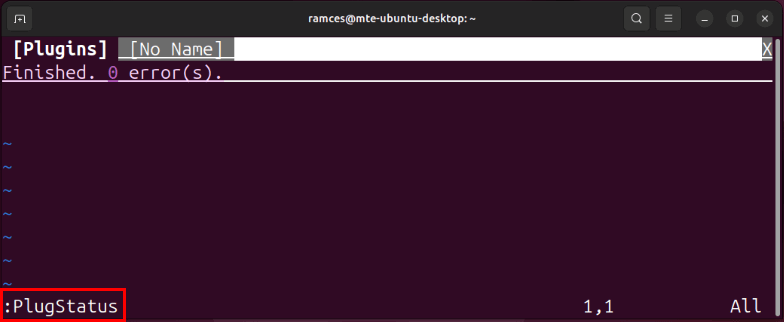
call plug#end()Save your .vimrc, restart Vim, then press Shift + ; (Semicolon) to bring up the command buffer.
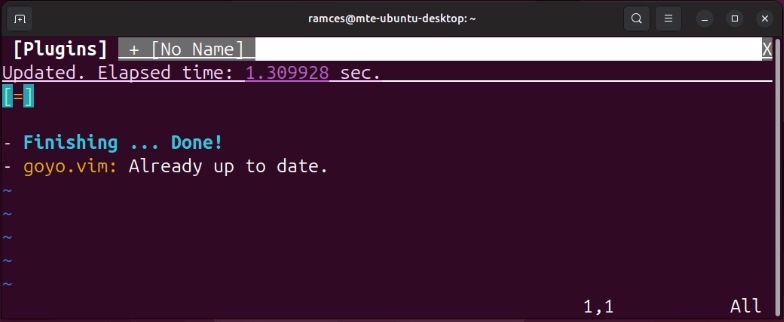
Enter PlugStatus on the buffer to confirm that you’ve properly installed Plug on your Vim instance.
To install a plugin, go back to the call plug#begin() section of your .vimrc file, then type “Plug,” followed by the Git URL of your plugin. For example, pasting the following code will install the Goyo plugin to your Vim instance:
Plug 'https://github.com/junegunn/goyo.vim.git'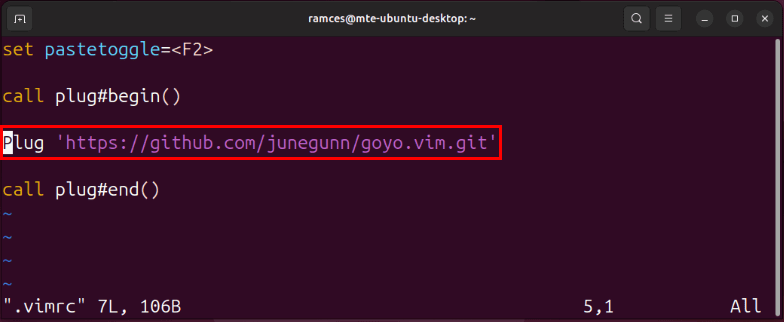
Restart your Vim client, bring up the command buffer, then run PlugInstall to start the plugin install process.
With the knowledge of how to optimize Vim under your belt, you can start exploring what this brilliant text editor can do for you. Learn how to turn Vim into a powerful word processor by adding some simple functions to your config file.
Image credit: Christina @ wocintechchat.com via Unsplash. All alterations and screenshots by Ramces Red.