Most games load assets in real time as you play, which is why it’s recommended to get an SSD for gaming. If you have a slow SSD – or worse, an HDD – you may notice longer game loading times, stutters, and even FPS fluctuations. However, before upgrading your storage, try the tweaks in this guide to improve game data loading times in Windows.
1. Disable NTFS Last Access Time
NTFS (default file system in Windows) keeps a record of the last access time for every file and folder (including game files) to track changes. However, this process also adds a bit of disk overhead, taking bandwidth that could be used by the game.
Usually, this information is used by backup tools to keep track of changes to sync only new changes, such as Windows File History. If you aren’t using this type of tool, disable it to improve game data loading speed.
Search for “cmd” in Windows Search, right-click on Command Prompt, and select Run as administrator. Enter the following command, and press Enter to disable NTFS last access time.
fsutil behavior set disablelastaccess 1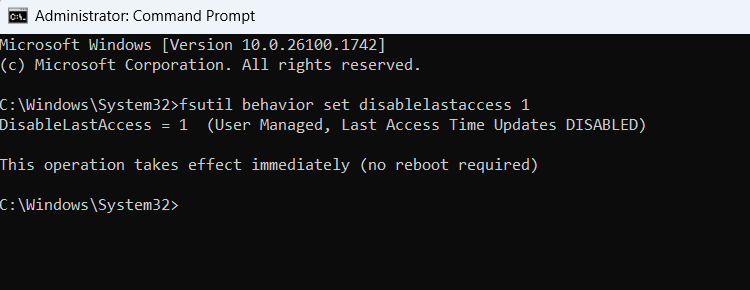
If you face any problems and want to revert from the change, use the following command in the Command Prompt to re-enable this function:
fsutil behavior set disablelastaccess 02. Enable Large System Cache
Windows is already quite aggressive in managing system memory and caching content, but you can still force it to cache even more by enabling the large system cache option. It may not be optimal for most users, but it can benefit users who play games with heavy assets.
Warning: you’ll have to edit the Windows Registry to enable this feature. Make sure you back up the Registry before making any edits, as wrong edits could lead to data loss or corruption.
Before enabling it, make sure you have sufficient RAM (16 GB minimum), as low RAM could lead to increased stutters, then search for “regedit” in Windows Search, and open the Registry Editor.
Move to the following location:
HKEY_LOCAL_MACHINE\SYSTEM\CurrentControlSet\Control\Session Manager\Memory ManagementDouble-click on LargeSystemCache in the right column, and set its value to 1.

3. Disable Antivirus Scanning for the Game Folder
All antivirus programs with real-time protection scan your files whenever you access them, including game files. When you launch your game, your antivirus program will scan its files to ensure nothing suspicious is happening. This process can add a bit of overhead that can decrease game loading times, including in-game asset loading.
If you trust the game and aren’t using any third-party mods, you can disable scanning for the game folder to improve data loading times. We’re demonstrating how to do it in Microsoft Defender Antivirus. If you use a third-party antivirus, look for the exclusion list in its scanning settings.
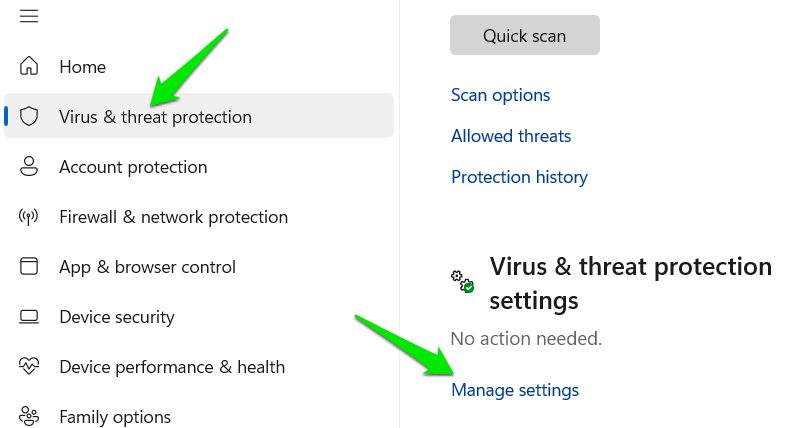
Search for “windows security” in Windows Search, and open the Windows Security app.
Move to Virus & threat protection, and click on Manage settings under Virus & threat protection settings.
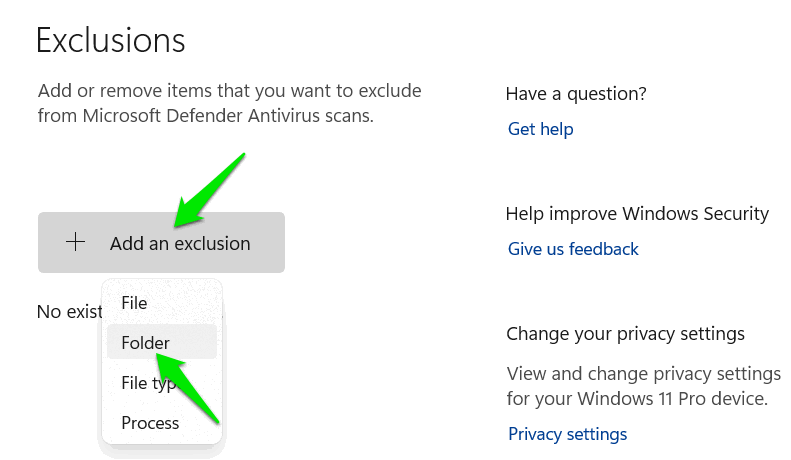
At the bottom, click on Add or remove exclusions under the Exclusions section, then click on Add an exclusion → Folder to select your game’s folder.
If you need to re-enable scanning, select the added game folder and choose Remove.
4. Try Using an exFAT Drive for the Game
By default, Windows uses the NTFS file system, which is better than exFAT or FAT32 in almost every way for Windows. However, exFAT excels at processing large files faster, as it avoids many overheads due to its focus on simplicity. Many games have large files, so your specific game may benefit from an exFAT formatted drive.
To create an exFAT drive, type “disk management” in Windows Search, and open the Disk Management tool.
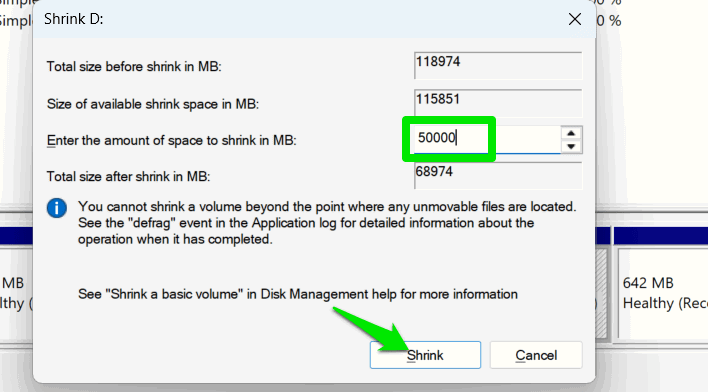
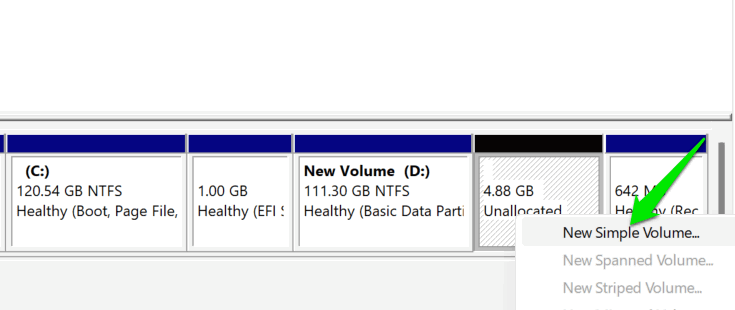
You’ll have to free up enough space to install your game; try shrinking one of the drives. Right-click on a drive you want to shrink, and select Shrink Volume. Enter the amount of space you need to install the game (try 20% more than the game requirement), and click on Shrink.
Right-click on the unallocated space, and select the New simple volume option. Follow the step-by-step wizard, and ensure that you select exFAT when asked to choose the file system.
Once created, you can install your game on this drive to see if loading times improve.
5. Disable Full-Screen Optimizations
By default, Windows optimizes full-screen games to work in a hybrid mode in full-screen but still interact with the desktop and other apps, similar to window mode. However, this convenience also has an impact on game performance, input lag, and even game asset loading times, due to secondary processes overhead.
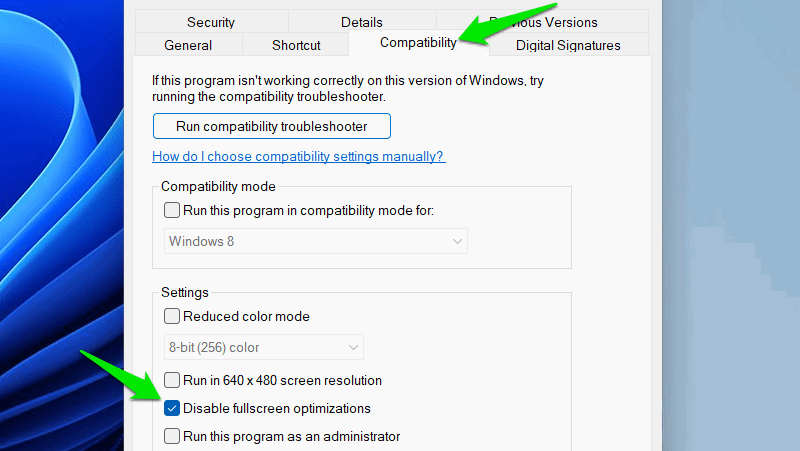
You can disable full-screen optimizations to possibly improve game performance and loading times by right-clicking on the game’s executable (.exe). Then select Properties.
Move to the Compatibility tab, and check the Disable fullscreen optimizations option. Alternatively, use a registry tweak to disable it system-wide.
Keep in mind that once disabled, you won’t be able to easily switch between apps (using Alt + Tab), and game overlays won’t work.
6. Increase Shader Cache Size
Your GPU stores precompiled shaders on the storage drive to reuse later, instead of creating new ones every time. The shaders are loaded during game loading or when new assets load during gameplay. You can increase the shader cache size to make sure you always have precompiled shaders to speed up loading times.
For Nvidia, open the Nvidia Control Panel, and go to Manage 3D Settings → Global Settings to find the Shader Cache Size option. By default, it’s 4 GB, but you can increase it to the recommended 10 GB for AAA games. Alternatively, select Unlimited if you have plenty of space.
You can’t adjust the shader cache size for AMD, but you can enable the option in the app to ensure it saves shaders. In the AMD Radeon Adrenalin Edition, go to the Global Settings, and set Shader Cache to AMD optimized.
7. Use a Third-Party Cache Management Program
While Windows does a fine job of managing memory, you can be more aggressive using a third-party app. PrimoCache is a reliable tool for this purpose. While it can do many things, we are listing it here for caching content in a portion of RAM to increase game loading times.
This app reserves a portion of your RAM and uses it exclusively for storing the cache of frequently used programs. Unlike Windows, which manages the whole RAM for both cache and active apps, PrimoCache will only force a portion for cache. Of course, you’ll have less RAM for active tasks, but it won’t be a problem if you have sufficient RAM (16 GB recommended).
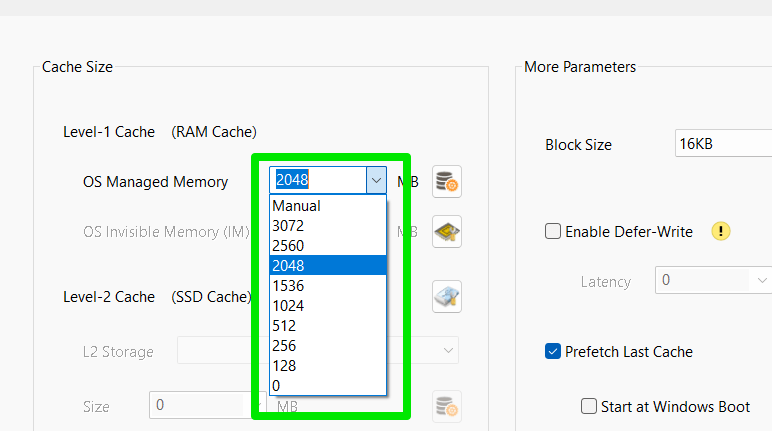
Launch the tool, and click on Create a new cache task at the top. After selecting a cache drive, choose Level-1 Cache. This is the amount of RAM PrimoCache will use for caching. Try to select the RAM amount that you can afford to give to PrimoCache without affecting your active programs (2 GB is a good start). Click on OK to start caching.
PrimoCache will have to track your frequently used programs to start caching them. In our testing, it successfully cached game data after two launches, and the cache persisted across system reboots.
PrimoCache comes with a 30-day fully functional free trial, but a paid license is required after the trial period.
Combined, these tweaks should provide a noticeable improvement in your game data loading times. We will also recommend you optimize Windows for gaming performance, as freeing up resources can also indirectly improve game loading speed.
Image credit: Vecteezy. All screenshots by Karrar Haider.