Do you have a box of fading family photos that you’re worried will crumble before the memories do? You don’t need a bulky scanner to save them; your smartphone can do the job. Hence, I’ll show you how to digitize old photos with your smartphone apps without hassle. So let’s preserve those memories in no time using clear and effective steps and a few tips for good measures.
Where to Digitize Old Photos?
When it comes to digitizing old photos with a smartphone, Google PhotoScan is your best shot. The app is free, supports both Android and iOS, and is packed with beginner-friendly features. Alternatively, you can use any of these smartphone photo scanner apps too, if Google’s product is not of your liking.
The good thing about Google PhotoScan is that it can tackle glare efficiently. It has a multi-angle scan to provide a clean and sharp image. Besides, you can easily store your digitized results into Google Photos since it’s part of the Google ecosystem.
While there are other smartphone apps to digitize old photos out there, PhotoScan keeps things straightforward while delivering solid results without issues.
How to Digitize Old Photos
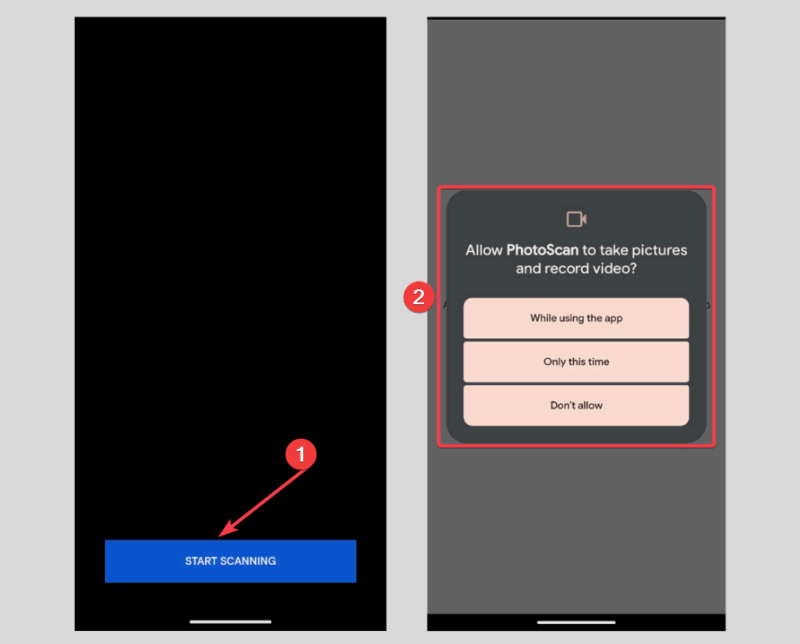
Here’s how to digitize old photos with Google PhotoScan: Download the app from the App Store or Google Play, click Start Scanning, and allow permission for camera and storage access.
You need to wipe off any dust on the photo and place it on a flat surface like a table.
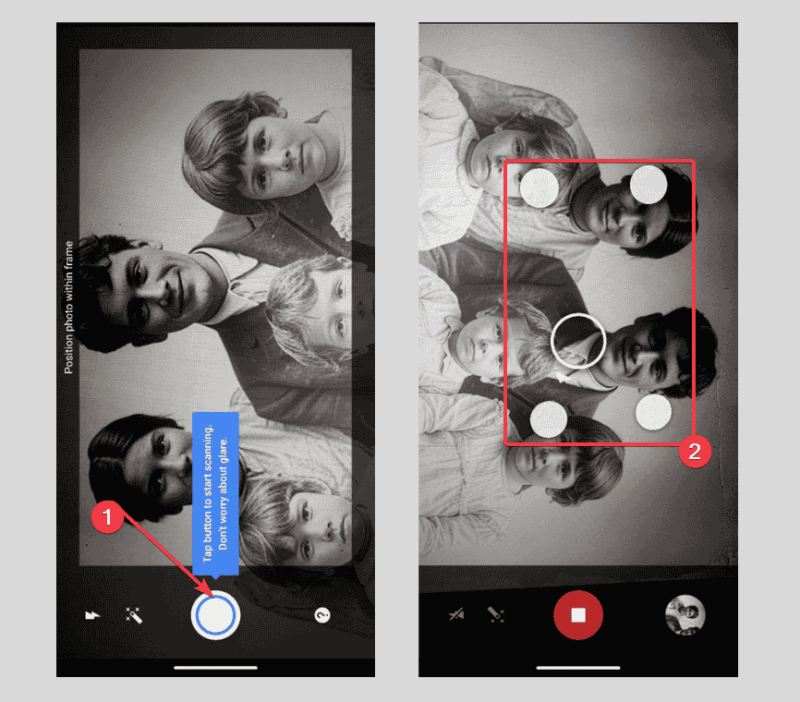
Place your smartphone over the photo and center it in the frame. Tap the shutter button, and you’ll see four white dots. Move your phone over each dot to scan. This is meant to kill the glare and stitch the scans together.
Afterwards, check the results. If you need to tweak it, tap the Adjust button to crop or rotate. Then, save it to your gallery or Google Photos if you’re signed in.
If you’ve got a stack to digitize, just repeat the process and sort them into folders, such as “Grandpa’s 80s,” for easy access. That’s it – no scanners, just your phone getting the job done.
FYI: Learn solutions to save your photos if your older Google Photos becomes corrupted.
Quick Tips for Successful Digitization
Make your digitized photos pop with these practical tips:
- Lighting is essential to get a good scan. Use soft daylight or a lamp when scanning, and avoid harsh shadows or direct sunlight.
- Stick with PhotoScan’s default resolution settings. The quality is high enough without consuming excess file space.
- Always back up your scans by saving them to Google Photos or an external drive. You can check out how to back up Google Photos to your computer for a bulletproof plan.
- Repair the scratches or enhance your digitized photos with tools like GIMP. You can try more advanced image processing with GIMP.
- Handle fragile photos with care. Touch them as little as possible, and wear cotton gloves if they’re brittle.
Now you know how to digitize old photos with your smartphone and Google PhotoScan. Reviving those fading memories will be easy, free, and, honestly, kind of fun. At least you can rediscover some classics you’ve forgotten this way. Start small, maybe with a few favorites, and build your digital stash. Have questions or a cool photo story? You can share it in the comments.
Image credit: Unsplash and all screenshots by Henderson Jayden Harper