You can interact with a Windows device using your voice inputs alone, without needing a keyboard or mouse. After all these years of voice controls being baked into Microsoft’s software updates, we have finally reached the promised land of perfection. Follow these steps to set up speech recognition on your Windows laptop or PC.
Related: check out how to set up the closely related Voice Access feature.
What is Speech Recognition in Windows
Speech Recognition is a built-in Microsoft feature that gives you hands-free access to your Windows computer based on your voice commands alone.
In the past, there used to be a similarly named “Windows Speech Recognition (WSR)” feature which has been deprecated. Voice Access replaces it entirely. The current version of online speech recognition is used for dictation, and training Microsoft apps to become familiar with a user’s unique voice pattern.
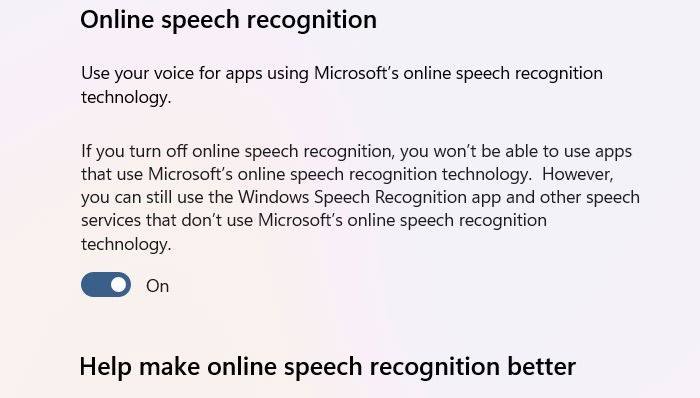
For Windows 11, you can access the feature from Settings -> Privacy & security -> Speech -> Online speech recognition, which has to be turned on. Windows 10 users should do the same from Start -> Settings -> Privacy & security -> Speech -> Online speech recognition.
Having speech recognition enabled in Windows helps people with physical disabilities as the hands-free interaction feels more natural and intuitive. But more importantly, every PC user can open applications, dictate text, and search for information without spending any more time than they do with a keyboard or mouse.
Toggling off Online speech recognition does not affect other Windows applications that use a microphone. You can continue using Game Bar, Voice Access, Sound Recorder, Teams or Zoom. Here are the simple steps to set up speech recognition in Windows for a built-in and external microphone.
Related: increase your microphone volume in Windows devices.
1. Ensure Your Windows Microphone is Working
Your Windows laptop has a built-in microphone that is embedded directly into your device. Enabling it is easy: on Windows 11, go to Settings -> Privacy & security -> Microphone. Here you need to turn on the Microphone access toggle.
Windows 10 users should navigate through Start -> Settings -> Privacy & security -> Microphone, and toggle on Allow apps to access your microphone.
Following the above tweak, enable another setting Let desktop apps access your microphone. Under it, you will see an integrated application, “Speech UX Configuration,” with a Last accessed timeline. This application’s status indicates that speech recognition is currently active on your Windows device.

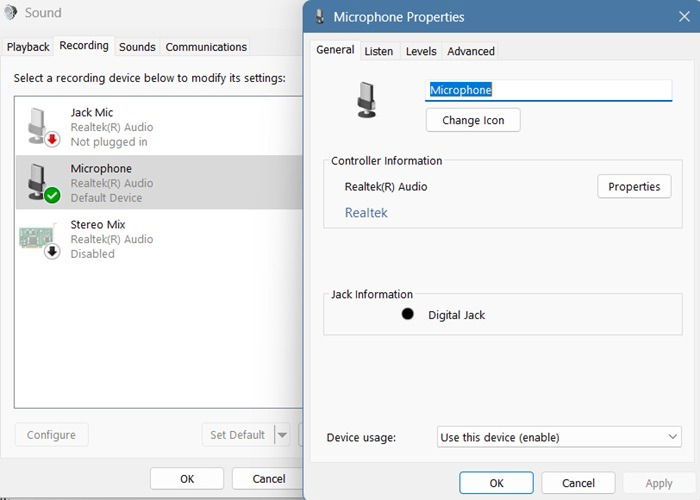
There are many ways to test whether your microphone is working correctly. On Windows 11, go to System -> Sound -> Advanced -> More sound settings, With Windows 10, the path is Start -> System -> Sound, which will open a pop-up window. In both cases, go to Recording. A green check symbol indicates that there are no issues with the microphone.
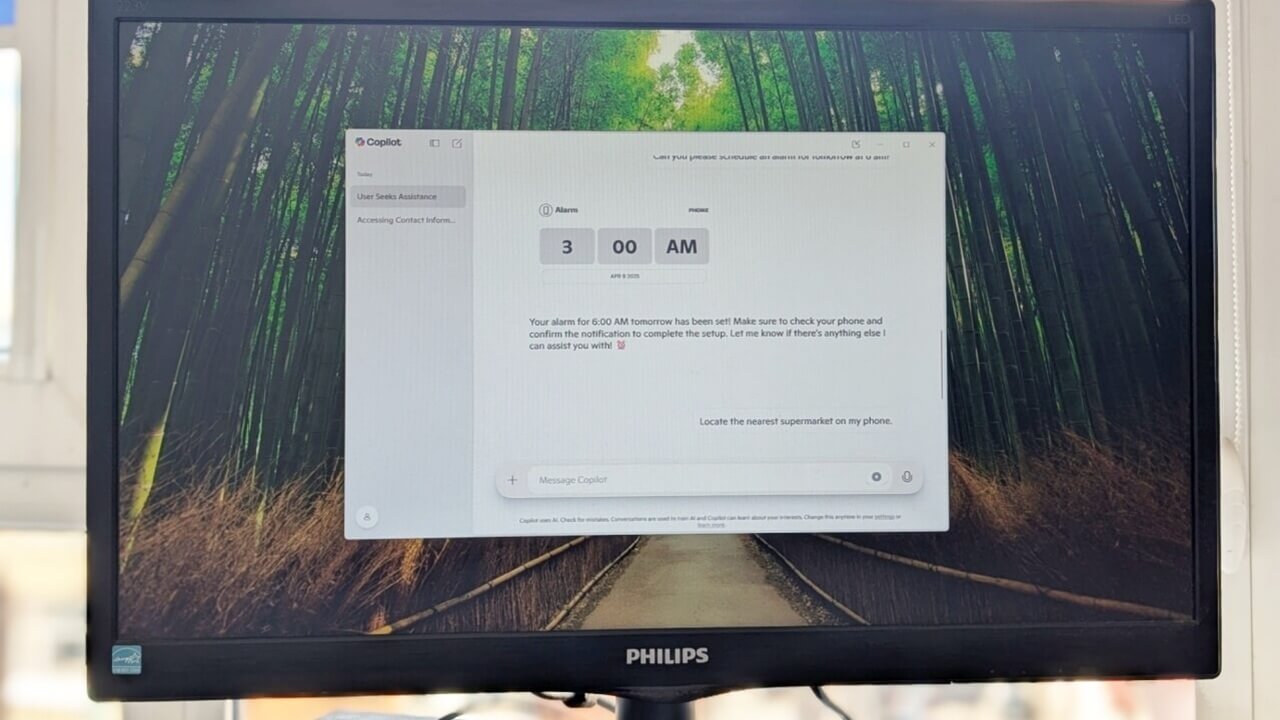
Another latest way which I personally prefer is chatting with the Copilot app. You just have to click the Talk to Copilot icon near its speech input area. If you’re having any troubles with the PC microphone, you can get it working through our simple fixes.
2. Pair an External Microphone (Optional)
With most modern laptops, you get very high quality speech interactions using the built-in microphone. However, as every podcaster or video creator will tell you, an external microphone adds more clarity to your voice.
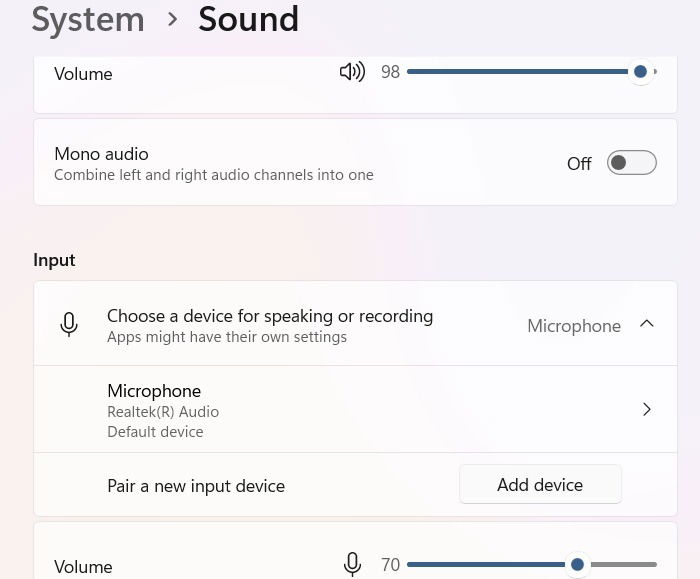
In Windows 11, go to Settings -> System -> Sound -> Pair a new device, and click Add device. For Windows 10 users, the path is Start -> Settings -> System -> Sound -> Input. Under a drop-down menu, you will find various microphones, including the system default.
For either of the two, click Add device to insert a new microphone. You can add a new microphone connected to the digital jack.
However, if the external microphone is connected via Bluetooth, there are a few essential steps to sync it with your laptop. You can also use a smartphone for your voice inputs.
Good to know: if you’re facing a background noise problem in your microphone, you can control it using “voice suppression” and by removing surrounding noise.
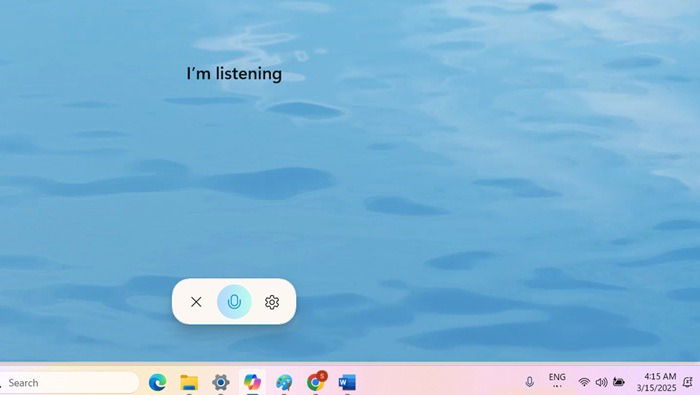
3. Set Up Speech Recognition in Windows
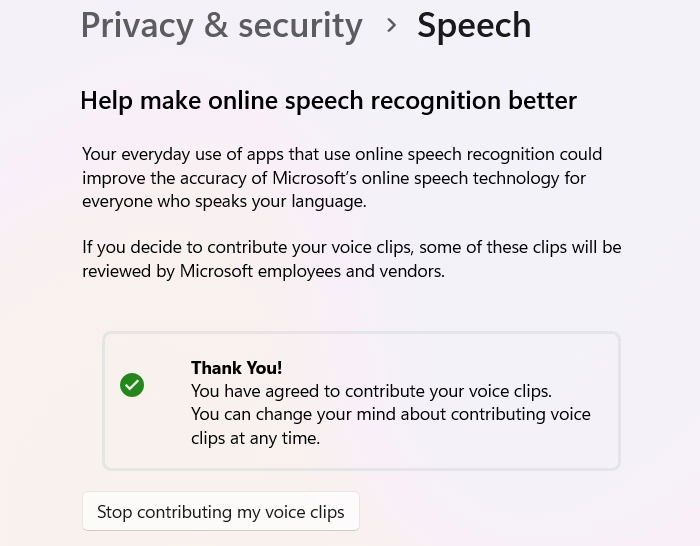
The next step is easy. You just have to go to the Online speech recognition page, and turn the toggle on. In order to finetune it further based on your personal voice, click the Start contributing my voice clips.
In the past, the training tool would have asked you to literally test your voice. But that process has been automated in the latest versions of Windows 11. Now, every time you use a Microsoft app, such as Copilot, or the Dictate feature in Word, Microsoft is automatically training the device to adjust to your accent and speech style.
Note that Speech Recognition also becomes more familiar with your voice through regular use, so just keep using it, and it should improve naturally. In the past, this intuitive feature would use a full list of commands, which were often used with Cortana, a deprecated app.
These commands are still quite useful, but you no longer need to remember any of them. It is because, these days, Microsoft has switched to a Natural Language Processing (NLP) design so you just need to talk the way you normally do.
In this guide, we saw the straight and easiest way to set up speech recognition in Windows. It is not the only accessibility feature that is useful. You can have great productivity with the Windows on-screen keyboard, especially on a touch PC or phablet device. There is Narrator which helps you hear your words come alive.
Image Credit: DALL-E 3. All screenshots by Sayak Boral.