Did you know that there’s an incredibly useful feature offered by Android Debug Bridge (ADB) that lets you manage Android devices without the hassle of cables? You can now use a wireless ADB connection to command your Android from within the same network. This guide reveals how to enable a wireless ADB connection on Android.
Should You Use Wireless ADB?
ADB is a powerful and easy-to-use command-line tool, and using its wireless functionality is not limiting. You can still develop, debug, or manage apps and files on your device. Ideally, wireless ADB is best suited for developers and testers who debug or test on multiple devices and want to avoid managing numerous cables. Yet, this doesn’t mean that general users shouldn’t have a cable-free experience.

Wireless ADB is a convenient alternative in scenarios where physical connectivity is impractical. For instance, when the device is mounted or the USB port is in a hard-to-reach location.
Regardless of its greater flexibility and convenience, the wireless experience may be slightly slower and less stable than a wired setup. More importantly, a wireless ADB could expose your devices to security risks, especially when wireless debugging is left active on public or unsecured networks.
Enabling Developer Options on Android
Before getting started with setting up the wireless ADB, make sure that you have the latest version of Android SDK Platform Tools on your computer. Refer to our guide on installing SDK Tools in Windows, and skip the “Install Android Studio” section intended for developers.
The first step is to enable Developer Options. Although the process is quite straightforward, the steps may differ between Android devices. I am using a OnePlus device.
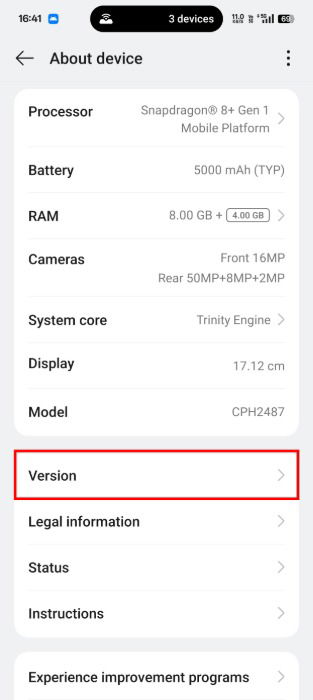
Open the Settings app, scroll to the bottom, and tap About device -> Version.
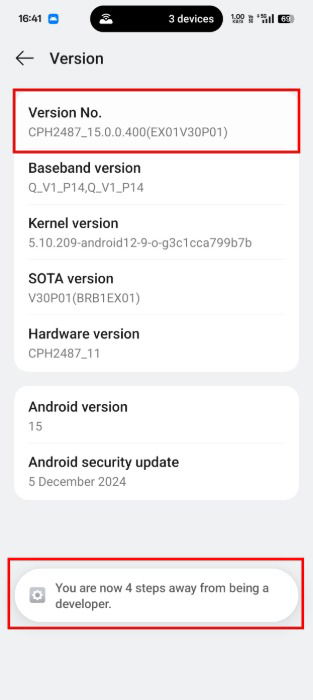
Tap Version No. seven or eight times until you see a toast message that says, “You are now a developer.” If you are using a device other than OnePlus, you may see an entry labeled Build Number instead.
Enable Wireless Debugging on Android
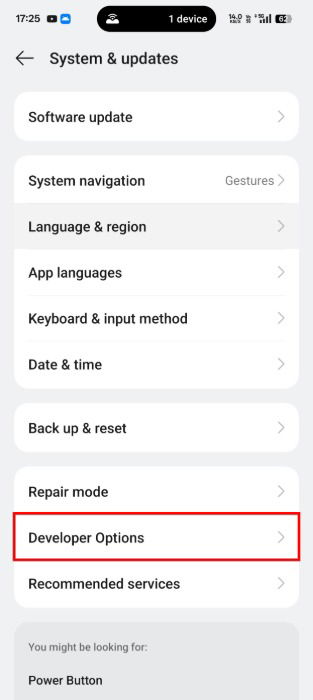
Open the Settings app, and select System & updates -> Developer Options.
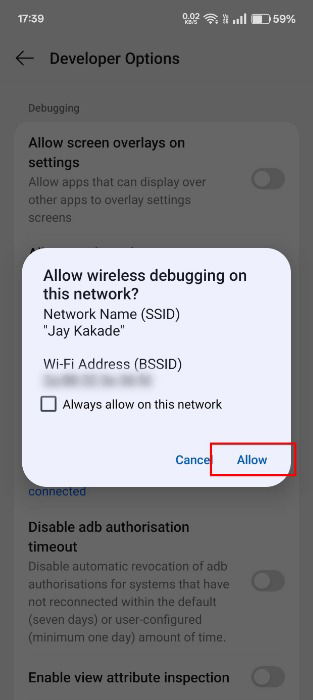
Toggle Wireless debugging to on. Note that the setting won’t enable until you’re connected to the same Wi-Fi network as your PC.
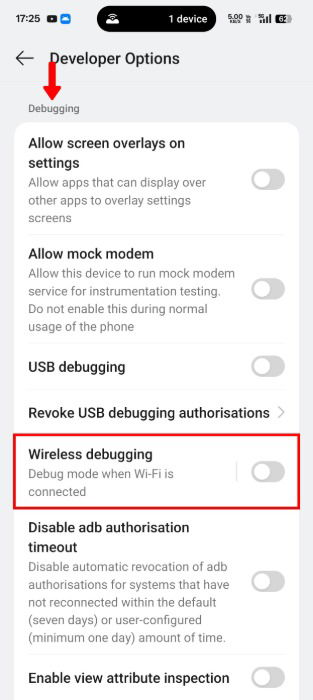
Click Allow on the pop-up menu to activate debugging on the connected network.
Pair Your PC with Wireless ADB
After successfully enabling Wireless debugging, it’s time to pair your PC with your Android device. Open the Wireless Debugging option via Settings -> System & updates -> Wireless debugging, and tap Pair device with pairing code.
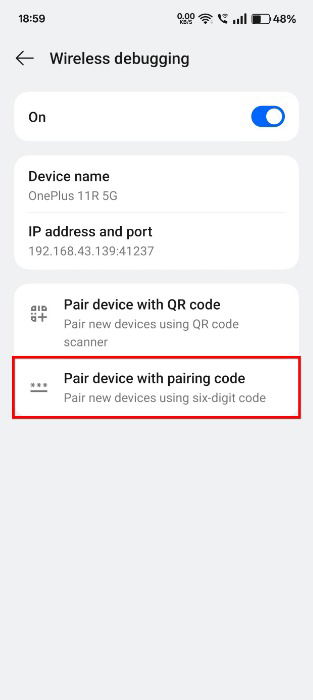
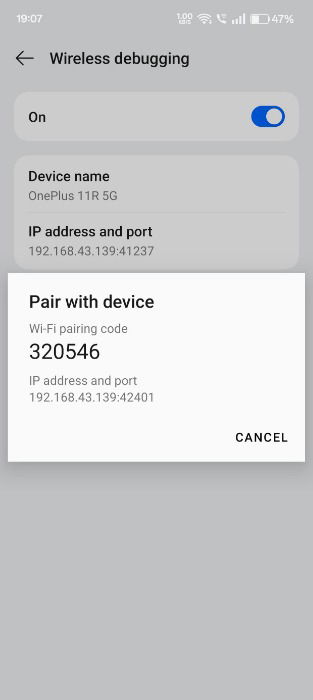
An IP address, port, and Wi-Fi pairing code will be listed. Be sure to jot down these details, as you will need them to pair with the PC.
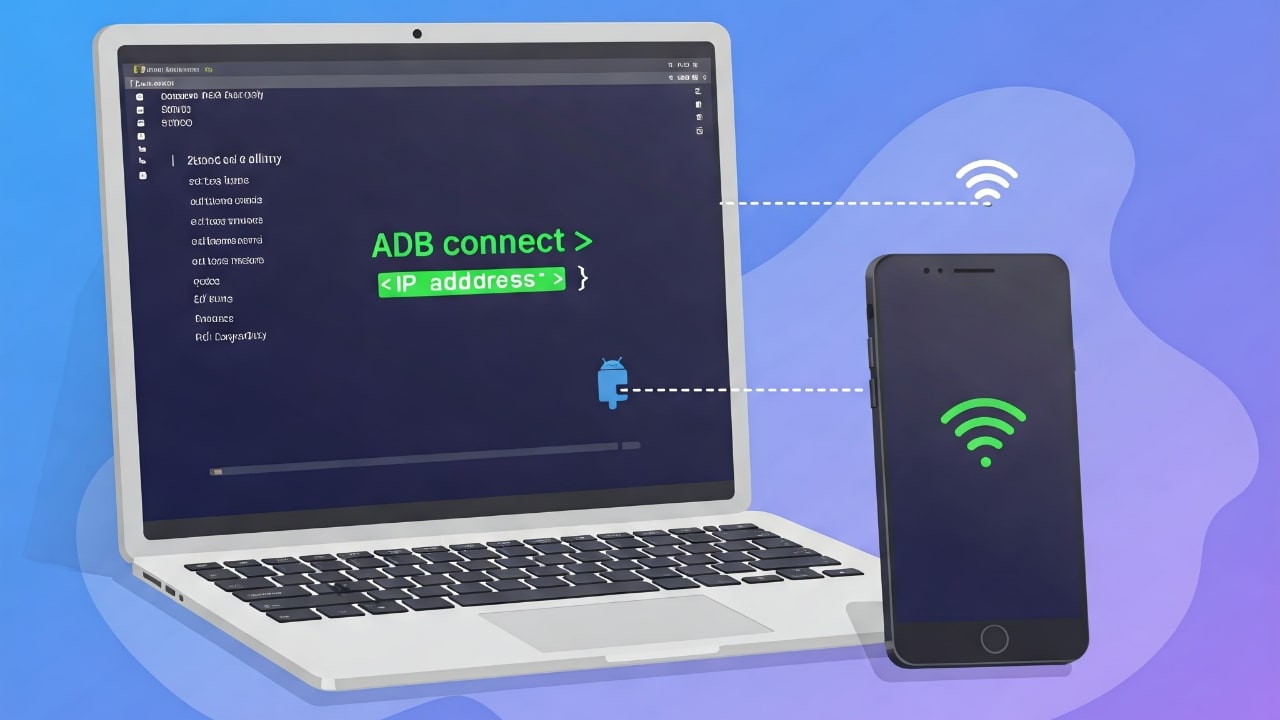
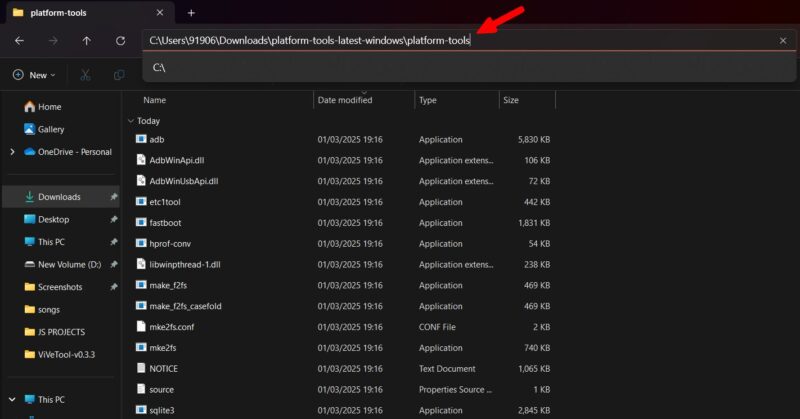
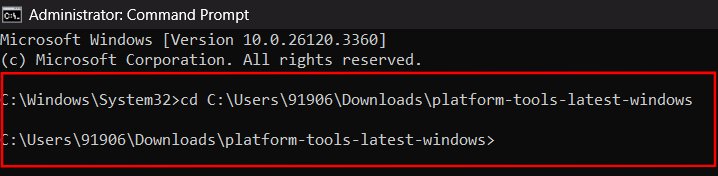
On your Windows PC, open Command Prompt as an Administrator, and use cd <path> change the directory to the Android Platform tools. Replace <path> with the actual platform tools’ directory path.
After changing the directory, enter the following command:
adb pair <IP-Address>Ensure that you entered the correct IP address. Command Prompt will ask you to enter the pairing code to ensure that you entered the correct IP address. Type in the Wi-Fi pairing code, and hit Enter.

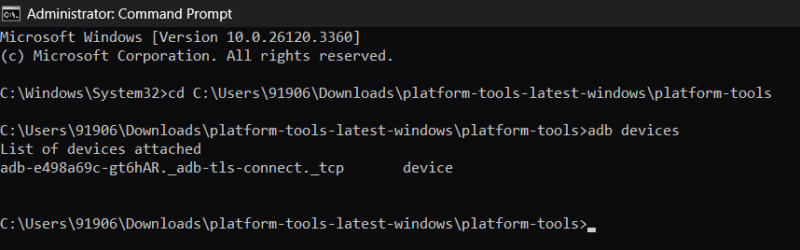
Use the adb devices command to verify that the wireless connection has been established successfully, This command lists all devices attached via ADB.
Though wireless ADB is one of the most convenient ways to control your Android device, it comes with security risks. To avoid potential issues, remember to disable wireless debugging after use.
Image credit: Imagen 3. All screenshots by Jay Kakade.